Friday, August 17, 2007

Roasted Corn, Jicama and Mango Salad

Next time, I'll reduce to amount of Jicama by half and increase the amount of corn by two or three. I couldn't get enough of the taste of roasted corn in this salad -- delicious! (And, yes, I left out the cilantro...)


Roasted Corn, Jicama and Mango Salad4 ears fresh corn, unshucked
1 large jicama, peeled and thinly julienned
1 ripe mango, peeled and chopped into 1/2-inch pieces
1/2 red onion, thinly sliced
2 tablespoons chopped cilantro leaves
Citrus vinaigrette, recipe follows

Preheat the oven to 400 degrees F.
Put the ears of corn on a baking sheet and place in the oven for 45 minutes. Remove and let cool. When the corn has cooled, shuck it and stand it on end. Using a sharp knife, run the blade down the cob to cut the kernels off. Rotate the cob and repeat until all the kernels have been cut off.

Combine the jicama, mango, red onion and cilantro in a large mixing bowl. Add the cooled corn, and toss with the vinaigrette. Chill until ready to serve.


Citrus Vinaigrette:
2 tablespoons fresh lime juice
2 tablespoons fresh orange juice
1 teaspoon freshly grated orange zest
2 teaspoons sugar
Dash hot sauce
1 cup olive oil
Salt pepper
2 tablespoons chopped cilantro leaves
In a large bowl combine the lime juice, orange juice, orange zest, sugar and hot sauce. Whisk together and slowly add the olive oil, whisking as you go. Add salt and pepper, to taste, and cilantro and whisk until combined.

Yield: 1 1/4 cups

Grilled Fish Tacos with fresh salsa

The marinade for the tilapia adds a subtle flavor. Kick things up with a healthy dose of salsa and a squirt of fresh lime juice.

Grilled Fish Tacos with fresh salsa

1 pound tilapia fillets
Marinade:
2 tablespoons olive oil
5 cloves garlic, smashed and finely chopped
1/2 jalapeno pepper, minced
1 1/2 tablespoons chopped chives/cilantro/Italian parsley leaves
Squeeze of lime juice
Ground black pepper

Combine tilapia with the rest of the ingredients. Grill (or saute) until opaque. Serve immediately on warmed flour or corn tortillas with salsa and lime juice.


Fresh salsa
Ripe tomatoes, chopped
1/4 to 1/2 red onion, diced
1/4 to 1/2 jalepeno, diced
salt and pepper to taste

Combine all ingredients; let sit 5 to 10 minutes before serving.

Wednesday, August 08, 2007

Retro Recipe Challenge # 8 Submission: Coconut Custard

RRC # 8 Deadline: August 10. Check out all the details at Food Maven . MAJOR thanks to Rachel for hosting RRC#8!!!

Interested in hosting an upcoming RRC? Send me an email at LauraRebeccasKitchenATgmailDOTcom
.


For RRC #8, Rachel of Food Maven and Coconut and Lime saved me from food carnival burn-out. Not only did she assume the mantel of hosting duties but she devised a terrific -- if not ingenious -- theme.

"This time around, " wrote Rachel, "we will be making food that wiggles and wobbles. Think aspic, Jell-O salad, gelatin parfaits, jelly candies or even jam."

It's called "Retro Wobbles but it Won't Fall Down." Awesome idea, right? I love it.

So after much searching, and then rejecting, of recipes (go AWAY, tomato aspic!) I finally picked up my copy of the Fannie Farmer Cookbook (originally published in 1896 under the title The Boston Cooking-School Cook Book by Fannie Merrit Farmer) and thumbed through its pages. There, I stumbled upon a recipe my mother had made frequently when I was very young, but I hadn't tasted in years: baked custard.

The recipe is very simple to make (stir, add , stir, pour, bake), and very easy to adapt. At the last minute, I decided to make the coconut variation by tossing in a 1/2 cup of flaked coconut.

The end result is the egg custard I remember with a layer of coconut at the top. Not bad at all, but I think I'd prefer it with coconut flavor throughout the custard, not just at the top so next time, I'd add a bit of coconut extract.

Having said that, the (coconut free) custard is just as I remembered it: smooth, lightly sweet and rich. Comfort food, plain and simple -- it's so, so good.


Baked Custard (see note for adapted coconut variation)

2 egg yolks, room temperature
3 eggs, room temperature
1/2 cup sugar
1/4 tsp. salt
3 cups very hot milk
1 1/2 tsp. vanilla
Nutmeg to taste

Preheat the oven to 350-degrees F. Butter a 1-quart baking dish or 8 ramekins. Se a shallow pan large enough to hold the baking dish or ramekins in the oven, and fill it with an inch of hot water. Beat the yolks and eggs together just enough to blend. Stir in the sugar and salt. Slowly add the hot milk, stirring constantly. Add the vanilla. Strain into the baking dish or dishes and sprinkle with nutmeg. Place into the water-filled pan and bake for about 45 minutes ; the custard is set when a knife inserted in the center comes out clean.

** Coconut variation: substitute 1 1/2 tsp vanilla for 1 tsp. vanilla plus 1 tsp coconut extract. After straining the custard, add 1/2 cup flaked coconut before pouring it into the baking dish(es).

Wednesday, August 01, 2007

Hawaiian Salad


At the beginning of this summer, Jenny & I headed down to the north end of Canandaigua Lake for a picnic. We'd stopped by Wegmans to grab dinner: a sub with chips and soda for me, and roast turkey sandwich with a side of Hawaiian salad for Jen.

As we sat on our picnic blanket gazing out at the lake, she offered me a taste of the fluffy desert salad on her plate.

I'm not a big fan of ambrosia, so I took only a small forkful. And then, I proceeded to eat the rest of her salad. Fortunately, Jenny didn't mind. I don't think.

At the risk of losing friends, I knew I had to try and recreate it at home.

The pineapple flavor stands out the most, with notes of citrus and coconut poking their way through, but it's all tempered by the mellow undertones of sour cream and marshmallow.

The texture features prominently too -- it's cool and creamy, mildly crunchy and, because the fruits' acids dissolve the marshmallows a tiny bit, soft and springy. The one difference between this version and Wegmans' is that this is a bit more liquidy, probably because I used low fat sour cream. It should be noted, however, that when I first mixed all the ingredients together, the salad was downright soupy but, after an hour in the fridge, the salad thickened up.


Hawaiian Salad

20 oz. can of pineapple chunks, drained
1/2 c. sweetened flaked coconut
2 cups mini marshmallows
1 Tbsp. sugar
2/3 c. low fat sour cream
11 oz. can of whole segment mandarin oranges (in juice), drained

In a medium bowl, combine pineapple, coconut, marshmallows and sugar until evenly distributed. Add sour cream; mix to combine. Gently fold in oranges. (Mixture will be soupy.) Cover bowl and chill for at least an hour.


Monday, July 30, 2007

Winter Night Salad


When Shane & I used to frequent Ports Cafe, I'd almost always order the winter night salad. It combines crisp romaine lettuce; sweet but tart apples; salty, tangy blue cheese; and a few other goodies to create a delectable salad.

I hadn't had it in over a year (we've been distracted by this place, this place, this place, this place, and many of these places) but the salad was very easy to recreate for dinner last night.

It's just as good as I remembered -- just as tasty, just as filling, just as satisfying.

If you're feeling a bit ambitious, complement the salad with a slice of good bread brushed with a bit of pesto and topped with Parmesan, broiled until the cheese melts a bit. The piquancy of the pesto and parm pairs well with the salad.

Winter Night Salad

1/2 bag of Romaine lettuce,
1/2 large "salad" apple, chopped (red for more color)
Raspberry vinaigrette (recommended: Newmans' Own)
1-2 Tbsp of blue cheese, crumbled (recommended: Old Chatham Ewe's Blue)
1-2 Tbsp dried cranberries
2 Tbsp red onion, chopped
1 Tbsp glazed walnuts

In a medium-sized bowl, toss lettuce and apples with raspberry vinaigrette to taste. Add blue cheese, cranberries onion and walnuts; toss again and adjust flavors as needed. Plate and top with fresh-ground pepper; serve with bread.

Yield: 1 large dinner salad or 2 appetizer servings .

Saturday, July 28, 2007

Food Bloggie Pets of the Month Submission: Chester the Cockatiel

The lovely Doodles, Mooncrazy, & Maltese Parakeet at Peanut Butter Etouffee announced the first ever Food Bloggy Pets of the Month, asking participants to blog about "any pet, as long as it's breathing." (Hee!)


Dead Parrot sketch jokes aside, here's Chester, a white-faced cockatiel, expressing interest in my copy of The Fannie Farmer Cookbook. Though, in all honesty, he's less likely to cook from it than chew up its pages. (If you look closely, you can see he snuck in a quick nibble of the Helen Corbitt Cook Book near his feet.) His hobbies include:

  • Chewing on books
  • Whistling the theme song from "The Sting"
  • Meowing
  • Favorite TV Character: Zippy in "John From Cincinnati"
  • Chewing on paper

Thanks to Doodles, Mooncrazy, & Maltese Parakeet for hosting this event!

Thursday, July 26, 2007

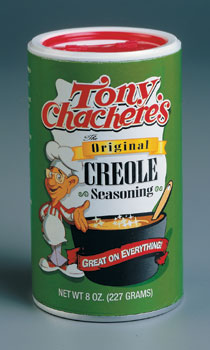
Food Love: Installation No. 1 -- Tony Chachere's Original Creaole Seasoning

Read about Food Love here.


I don’t fully know what’s in Tony Chachere’s Original Creole Seasoning -- the ingredients list reads mysteriously: “ salt, red pepper and other spices, garlic and silicon dioxide (to prevent caking)” -- but it packs a spicy and delicious wallop. (It must be all the tasty silicon.)

In the past week since I discovered it (I must be the last one to the party since it’s been around since 1972), I’ve sprinkled it on fish, burgers, pizza, beans and rice, and right now, popcorn. My tongue and lips are tingling with flavor and fire, and I can’t wait to figure out what its jolts of heat and flavor will perk up next.

I know this probably doesn’t make sense, but it’s “zazzy.” And I like it.

Food Love


From time to time, I fall hard and fast for a particular type of food. My love for it is all consuming– I have difficulty thinking about any other flavor, it’s what I crave, it’s what I want, it’s what I need -- until something inside me clicks and I’m ready to move on to something else.

Food Love will be a recurring feature seeking to document these fickle taste affections. I hope you enjoy reading them, and I hope you'll share your own Food Loves with me.

Wednesday, July 25, 2007

You know what this needs? GARLIC.


I'm all about delicious and easy recipes, so I'm a big fan of Mark Bittman's mission (at least that's the way I see it) of serving those up. Last Wednesday, the New York Times published his list of 101 Simple Meals Ready in 10 Minutes or Less (which has been at the top of NYT.com's most e-mailed list all week) and, on Monday, I stumbled upon Bittman's recipe for Penne with Ricotta, Parmesan, and Peas.

It's a very simple recipe (cook pasta, cook peas, throw them together with ricotta, parm, salt and pepper) but it's also kind of bland. Really, how much more difficult would it be to saute several cloves of minced garlic in olive oil and toss it in with everything else? Answer: NOT HARD AT ALL.

So the moral of this story is: for maximum deliciousness with minimum effort, add garlic.


Monday, July 23, 2007

Cardamom Banana Bread

As long as I've known Shane (coming up on six years), he's wanted to go on a camping trip.

My idea of camping is staying at a hotel that doesn't leave a mint on the pillow. (HEY-O! I'll be here all week!)

So we've never been. Oh, Shane has tossed out the idea of buying a tent, snuggling in sleeping bags and finding a wild spot near a waterfall -- but it's never come to anything. And, I certainly did nothing to encourage it.

Until this year -- sort of. Last week, we headed down to the Hayowentha cabin in Onanda Park, a former YMCA camp turned public park on the shores of Canandaigua lake. (I made sure to get the only cabin with an indoor bathroom.) We cooked on a grill outside, or used the propane fueled Coleman stove Shane bought for the occasion.

Just before we left, though, I used some nearly over-ripe bananas to bake up loaf a Cardamom Banana bread. I increased the amount of ground cardamom (to one teaspoon) but still couldn't detect it in the final product (sigh). Still, the bread was delicious: it had a fresh banana flavor that I haven't tasted in banana breads before and it was wonderfully moist. The bread was a wonderful quick breakfast or afternoon snack at the camp ground.

Cardamom Banana Bread (adapted)

2 cups cake flour
3/4 teaspoon baking soda
1/2 teaspoon salt
1/2 cup granulated sugar
1/2 cup packed brown sugar
1/4 cup butter, softened
2 large eggs
1 1/2 cups mashed ripe banana (about 3 bananas)
1/3 cup reduced-fat sour cream
1 teaspoon ground cardamom (or more)

Preheat oven to 350-degrees and coat a 9 x 5-inch loaf pan with cooking spray.

Lightly spoon flour into dry measuring cups, and level with a knife. Combine the flour, baking soda, and salt, stirring with a whisk.

Place sugars and butter in a large bowl, and beat with a mixer at medium speed until well blended (about 1 minute). Add the eggs, 1 at a time, beating well after each addition. Add banana, sour cream, and cardamom; beat until blended. Add flour mixture; beat at low speed just until moist. Stir in pistachios. Spoon batter into loaf pan and bake for an hour or until a wooden pick inserted in center comes out clean. Cool 10 minutes in pan on a wire rack; remove from pan. Cool bread completely on wire rack.

Sunday, July 22, 2007

La Cocina

I just found this article on NYT.com and thought it needed to be shared. I love that La Cocina helps women take their talent and passion for cooking and aids them in turning this into a sustainable and profitable career.


New York Times
June 23, 2007
For Women, a Recipe to Create a Successful Business
By Laura Novak

SAN FRANCISCO — One morning in May, Veronica Salazar stuffed refried beans into sandal-shaped masa cakes, concentrating to block the commotion in a cavernous kitchen here in the Mission District. The chopping of vegetables added to the din as the clang of metal pans against stainless steel equipment competed with background music from a local Spanish-language radio station.

But this kitchen, known by the Spanish name La Cocina, is no ordinary restaurant or commercial operation. Instead, the chefs here — all women, most of them immigrants — work side by side to achieve a common goal: starting their own food businesses and, in some cases, elevating themselves out of poverty.

Known as a “kitchen incubator,” La Cocina (la-koh-SEE-nuh) is a shared-use space created two years ago to provide a platform for women entrepreneurs without assets. Offering a low hourly rate for access to 2,200 square feet of restaurant-quality kitchen space, the nonprofit La Cocina also provides training from high-profile mentors and technical assistance on creating business plans and building marketing programs.

“There’s an entrepreneurial gene,” said Valeria Perez Ferreiro, executive director of La Cocina. “And we are finding amazing entrepreneurs who are already cooking or have a product that is so promising that it deserves to be seen in the market and that we think has a chance for success.”

Ms. Salazar, 32, was one of the first participants in La Cocina and is one of its bigger successes. Her company, El Huarache Loco, makes traditional foods from Mexico City.

Working with intensity, she needed to produce 700 of her trademark huaraches, the bean-filled cakes, for her weekly booth at a farmer’s market and hundreds more for Carnaval San Francisco festivities over Memorial Day weekend. She also prepared fish and shrimp ceviche as an employee stirred 30 gallons of carnitas in a brazing skillet for a catering job for 100 people.

“I come here to learn all the business, and I need to learn more every day,” Ms. Salazar said, while dicing pounds of tomatoes for a salsa roja. “Tomorrow, I have three parties. So if I do this tomorrow, I know I can do something by myself.”
The specialty foods prepared here are a reflection of the ethnic makeup of La Cocina’s participants. More than half the women are Latina, with another 8 percent African-American. The rest are Asian or Caucasian. Their products, both fresh and packaged, range from Mexican street fare to Irish chocolates, vegetarian sushi, South African meat pies and Brazilian cakes.

La Cocina has opened its own booth at the high-end Ferry Building Marketplace, where it sells its participants’ packaged products along with house-made charcuterie, pricey olive oils and $8-a-dozen organic eggs.

Every day La Cocina’s calendar is replete with participants preparing packaged products and hot food for catering jobs, coffee shops and a busy farmer’s market near the airport. Anna Shi’s Gourmet has a standing weekly order for 900 of her vegetarian tofu egg rolls for the Berkeley school district. Maria del Carmen Flores sells 1,500 of her yucca and plantain chips in 50 stores. Independent grocers around the Bay Area and Whole Food Markets throughout the state have picked up many of La Cocina’s specialty products.

“The really cool thing about a business incubator is that when you get entrepreneurial people in one place, there’s a synergistic effect,” said Tracy Kitts, vice president and chief operating officer of the National Business Incubation Association, a nonprofit membership organization. “Not only do they learn from staff, they learn tons from each other, and this really contributes greatly to their success.”

The association estimates there are 1,200 incubation programs in the United States. Only 19 of them are kitchen incubators, Mr. Kitts said, because the start-up and operating costs are much higher than for a mixed-use space. Eight of those programs are in urban areas, including Rochester, New York City, Denver and Minneapolis.
La Cocina is housed in a starkly modern structure wedged among tattered row houses and apartment buildings in the Mission District. Residents are primarily low-income people from Mexico and El Salvador, where Ms. Perez Ferreiro says there is a strong tradition of entrepreneurship.

La Cocina was created by the California Women’s Foundation in response to a survey that indicated that 90 percent of women in the Mission District said they needed adequate equipment and proper permits to run their businesses, but that commercial kitchen space in San Francisco was either unaffordable or geographically inconvenient. Many of them said they were cooking illegally out of their homes.
The foundation and government grants make up more than three-quarters of La Cocina’s $575,000 annual budget. About 17 percent of its funding comes from rent charged to six commercial tenants (including men), who pay $30 to $40 an hour, depending on the type of equipment being used. The program participants pay $8 to $10 an hour for the space, utensils and small ware.

“We are not creating a parallel nonprofit world where they are in a sheltered workshop,” Ms. Perez Ferreiro said. “The reason we charge a fee is that we want them to have a business model that is sustainable. If they don’t incorporate the cost of doing business, it’s artificial, and it’s going to crumble.”

To avoid that, Jason Rose, La Cocina’s culinary director, and Caleb Zigas, the program director, both of them bilingual, meet weekly with the women to review food costs, recipes and sales and marketing plans. Participants also pair with consultants from partner organizations who work on finances and cash flow statements.
Ms. Salazar of El Huarache Loco employs five family members at her booth at the Alemany Farmers’ Market, where Mr. Zigas says she takes in $3,000 every weekend. Costs of goods, licenses, employee wages and kitchen rental means she nets $1,000. But he points out that Ms. Salazar will soon be able to afford to buy a home; he is searching for commercial space for her to open a restaurant, a prospect he calls “thrilling.”

“It’s the translation from informal economy, which is cash-in, cash-out, to a formal economy, which is concept, then investment, then growth,” Mr. Zigas said. “It’s a really hard conceptual translation to make, to go from knowing how much you’re making every day to thinking about money in a longer-term vision.”

When Jill Litwin applied to La Cocina, she had abundant vision but needed help with what she calls her “road map.” Ms. Litwin is the owner of Peas of Mind, a line of frozen organic toddler food that she developed in Vermont.

At first, she was only capable of making 12 mini-casseroles at a time. The staff brought in a food scientist to help Ms. Litwin recalibrate her recipes so that each batch would turn out 400. They also introduced her to a human resources specialist and made a critical introduction to a food buyer for Whole Foods Market.

“They are helping people produce products that are high quality and of great integrity,” said Justin Jackson, executive coordinator for purchasing at Whole Foods in Northern California. “If it wasn’t well thought through and executed properly, our interest wouldn’t be what it is.”

Peas of Mind is now in 80 stores in California, 20 of them Whole Foods Markets, which is discussing plans to take her product national. Ms. Litwin says she has doubled her 2006 sales in the first quarter of this year.

“If you are an entrepreneur, you are in your own world and you never know if you’re on the right track,” Ms. Litwin said. “This is definitely a community you can bounce ideas off of. And if they don’t know the answer, they’ll find somebody who does.”

Friday, July 13, 2007

Mother's Souvlakia with Tzatziki


The chicken in this Cooking Light recipe is quite good, but it's the tzatziki that makes everything delicious. Trust me and double the amount of tzatziki you make so you can drizzle it all over your chicken and some pitas toasted on the grill, too. It's so freakin' good.


All hail the mighty Tzatziki!


Mother's Souvlakia
Marinade:
1/2 cup thinly sliced onion
2 tablespoons olive oil
1 1/2 teaspoons fresh lemon juice
1 1/2 teaspoons finely chopped fresh parsley
1/4 teaspoon dried oregano
1 bay leaf
1 pound skinless, boneless chicken breast, cut into 32 bite-sized pieces

Skewers:
1/2 red onion, cut into 8 (1-inch) pieces
1/2 large green bell pepper, cut into 8 (1-inch) pieces
8 button mushrooms
8 large cherry tomatoes
1/4 teaspoon salt
1/4 teaspoon black pepper
Cooking spray
Tzatziki Sauce

To prepare marinade, combine first 6 ingredients in a large zip-top plastic bag; add chicken. Seal and marinate in refrigerator 3 hours; turn occasionally.
Prepare grill.

Remove chicken from bag; discard marinade. Thread 4 chicken pieces, 1 piece each red onion and bell pepper, 1 mushroom, and 1 tomato alternately onto each of 8 (10-inch) skewers. Sprinkle with salt and black pepper.

Place kabobs on grill rack coated with cooking spray; grill 12 minutes or until chicken is done, turning once. Serve with Tzatziki Sauce.

(Totals include Tzatziki Suace.)

Yield: 4 servings (serving size: 2 skewers and 2 tablespoons tzatziki sauce)

CALORIES 143 (31% from fat); FAT 4.8g (sat 0.9g,mono 2.9g,poly 0.5g); PROTEIN 16.5g; CHOLESTEROL 35mg; CALCIUM 69mg; SODIUM 277mg; FIBER 1.7g; IRON 1mg; CARBOHYDRATE 8.5g

Tzatziki

1 cup finely chopped seeded peeled cucumber
1/4 teaspoon salt
1 (8-ounce) carton plain low-fat yogurt
1 1/2 teaspoons chopped fresh parsley
1/2 teaspoon fresh lemon juice
1/2 teaspoon olive oil
1/8 teaspoon black pepper
1 garlic clove, minced

Preparation
Place cucumber in a colander over a bowl; sprinkle with salt. Toss gently to coat. Cover and chill 1 hour. Rinse with cold water; drain well. Squeeze until barely moist.
Spoon yogurt onto several layers of heavy-duty paper towels; spread to 1/2-inch thickness. Cover with additional paper towels; let stand 5 minutes. Scrape into a bowl using a rubber spatula.

Combine cucumber, yogurt, parsley, and remaining ingredients in a bowl. Serve with Mother's Souvlakia.

Yield
1 cup (serving size: 2 tablespoons)

Nutritional Information
CALORIES 21(29% from fat); FAT 0.6g (sat 0.3g,mono 0.2g,poly 0.0g); PROTEIN 1.5g; CHOLESTEROL 3mg; CALCIUM 53mg; SODIUM 91mg; FIBER 0.1g; IRON 0.1mg; CARBOHYDRATE 2g

Wednesday, July 11, 2007

Italian Lemon Cookies


***WARNING: long, rambling blog post ahead featuring dental mishaps. Scroll down for recipe.***

I have a long history of hating dentist visits. When I was 8, I knocked out the bottom half of my top, front tooth when my bike collided with another kid's bike. A neighborhood mom sent me running for home, crying, carrying the tooth fragment in my hand.

I don't remember much about the incident other than being taken to the VA hospital where my uncle -- a dentist -- was working. Earlier in the day, an HIV-positive patient had been in and the dental station where he'd been was taped off with yellow and black "danger" tape. I was hurried past, the adults speaking in urgent, hushed tones. In my uncle's station, I lay back in the chair, frightened and struggling not to see my broken tooth reflected in my uncle's protective goggles.
Bonding was placed on the remaining shard of my front incisor, remaining there for nearly 20 years until that same uncle replaced it with a well-crafted porcelain crown. I was heavily sedated.

In my middle school years, there were a number of visits to Dr. Ianuzzi, who filled the cavities dotting my molars. Ianuzzi was tall, dark and hairy, with the gentleness and temperament of frustrated serial killer. His hygienists -- and I have found many hygienists to be this way -- were overly permed, lids heavy with blue eyeshadow, and spoke in cooing, cotton-candy toned voices, better suited for pre-school TV programming than legitimate medicine.

Two years ago, I visited yet another dentist for a check up. With barely contained glee, she pointed to my new X-rays, and asked me, "What's wrong with this picture?"
Not being a dentist, I could only guess. So she pointed again -- to the three wisdom teeth that had not "erupted," and pointed at other teeth in 45-degree angles, on a trajectory never to emerge above the gum line. The one wisdom tooth which had made it out should be extracted, too. ("Might as well!" she'd chirped .) I'd need $5,000 in dental work. The wisdom teeth -- an oral surgeon who would cut into my gums and chisel out the bloody fragments -- would cost extra.

I am finally addressing that dental work she recommended, albeit at another dentist, for a much lower price ($1,500). Today, he replaced three fillings first installed during the Ianuzzi days, and if not THE most traumatic dental experience I've had, it's certainly up there.

I suppose he's not a fan of the topical anesthetic that gives some relief to the giant needle entering a patients gums, as he injected me not once, not twice, but three times with a torture device from Orin Scrivello's office. A tear ran from the corner of my right eye, rolled down my check and landed in my hair. I was handed a tissue.

Then, metal clamps were put on my teeth, which helped hold onto the latex dental dam he then stretched across my mouth. "OK," he said. "Now we're ready." At first, I wasn't sure if he was referring to dental work or oral sex but, when I saw a loud, spinning drill head approaching my mouth, I resigned myself to the former.

The next two hours were filled with drilling, scraping, pushing, picking, and grinding. Had The Big Dig been rerouted to teeth 19, 20 & 29? Was he pushing my molar around because it had gotten fresh with him?

When he asked his assistant for a "ball burner," I'd never been so happy not to have testicles.

When it was finally done, he told me I'd be sore when the anesthetic wore off. (It did, and I am.) On his way out of the room, he told me not to eat until I'd gained feeling back, otherwise I might "bite off [my] tongue or lip and not even know it."

It was at this moment that I finally cracked, leaving his assistant to explain which teeth should be done next to me, a visibly shaken, teary-eyed patient. "Are you OK?" she asked, surprised. "Was it something we did? Said?"

I smiled as best I could with a jaw, chin, bottom lip, and tongue completely without feeling and said, "It's me. I'm just freaked out by all this. Where's the bathroom?"

I left the office 10 minutes later, $450 lighter and an appointment to go back in two weeks.

It didn't really hit me until I got home (conveniently just around the corner from the DDS) how upset I was, and how badly I needed a distraction. With that, I decided to bake up some Italian Lemon Cookies I've long been meaning to make. While the work involved did little to distract me from my numbed and swollen jaw (note: when my tongue is numb, so are my taste buds) now that both the cookies are done and I've regained most of the feeling in my mouth, they are a comfort. (Well, the one bite I had was a comfort. Now that the anesthetic has worn off, I'm sore from the injections. The fun doesn't stop.)

Back to the cookies: they're cakey, soft and a bit crumby, with a subtle lemon balanced with a gentle sweetness. Mmm-mmm. I'm looking forward to eating a whole mess of them tomorrow.


Italian Lemon Cookies (from Wegmans Menu Magazine Holiday 2004, pg. 54)

1 cup shortening (if desired, use butter in place of half or all the shortening)
1 1/4 cups granulated sugar
4 eggs
1/3 cup plus 2 Tbsp sour cream
2 1/4 tsp lemon extract
1 tsp vanilla extract
Grated zest of 1 lemon
4 1/2 cups all-purpose flour
4 1/2 tsp baking powder

Icing
1 cup confectioners' sugar
2-3 Tbsp warm milk
1/2 tsp lemon juice (optional)

Preheat oven to 350 degrees.
Beat together shortening and sugar in medium bowl until light. Add eggs, sour cream, lemon extract, vanilla extract, and lemon zest; beat until combined, scraping down sides of bowl. Combine flour and baking powder; add to mixture in bowl and beat just until moistened.

Shape dough into small balls, using about 1 level Tbsp for each. Arrange about 1 inch apart on parchment paper-lined cookie sheets. Bake 10 to 12 minutes, until lightly browned. Do not over bake. Remove from pans and cool.

Combine confectioners' sugar and milk in small bowl; whip lightly with spoon until smooth and slightly thick. Add lemon juice if desired; stir briskly until well-combined. Dip tops of cookies into icing; decorate with sprinkles if desired. Let set until icing is dry to the touch. Store in closed container.

Yield: approximately 4 dozen cookies.

Nutrition Info: Each serving (2 cookies) contains 160 calories, 22g carbohydrate (0g fiber), 2g protein, 7g fat (2g saturated fat), 25mg cholesterol and 70mg sodium.

Monday, July 02, 2007

Retro Recipe Challege # 8: Retro Wobbles But It Won't Fall Down


I'm thrilled to announce that the next edition of the Retro Recipe Challenge will be hosted by Rachel of Food Maven. (Thank you, Rachel!)

Here's her announcement & fabulous theme!

I'm excited to be hosting RRC #8: Retro Wobbles But It Won't Fall Down. This time around we will be making food that wiggles and wobbles. Think aspic, Jell-O salad, gelatin parfaits, jelly candies or even jam. The only catch? You have to use a recipe that was first published before 1985. For help in finding a recipe, check out the "helpful links" sidebar on the Retro Recipe Challenge blog.

Once you've created your dish, post a picture of the finished product, along with the recipe and your review to your blog or flickr account. Don't forget to include the year the recipe was first published and its source.

When you're done, send an email to coconutlimeblogATgmailDOTcom by August 10th at 11:59pm EST. In the email, please include:

Your name or blogging nickname
Your blog's name and URL
The recipe's title
The post's URL
Please attach a photo (no larger than 100x100 pixels) and include "RRC#8" in the subject line.


The round-up will posted by August 12th on Food Maven and the Retro Recipe Challenge Blog.

Friday, June 29, 2007

Two Trifles

Last night, I had this crazy dream in which I was on Saturday Night Live. Incidentally, I was not a main cast member, but one of those comedians who get relegated to the back of a scene while an Amy Poehler-type shines. So sad.

Earlier in the day, I had been on the set of Conan O'Brien (I don't know why) and there had been an explosion. Not an comedy explosion, but an honest-to-God fiery explosion with heat and smoke and flying glass. Needless to say, it traumatic. Conan suggested I take Saturday off.

Dedicated to my job, I went to work with the intention of performing on Saturday. But it was hard to function. So I asked Lorne Michaels -- who was not actually Lorne Michaels but the character Danny Tripp -- if I was in any scenes on Saturday. Brusquely, he said, "No."

So, I asked for Saturday off. And Tripp turned on me, telling me that I had to come in because even if there weren't scenes for me to be in, it was important I was on set to watch children and tend to chickens.

I burst into tears, because a) I was singed by an explosion earlier in the day, and that was stressful, and b) my asshole boss was essentially telling me my dream of being a comedian was fruitless but hey, I could always be a chicken herder.

Then Danny Tripp fired me.


At least in my waking life, I'm successful at making dessert. This lime-berry trifle is delicious: light, tangy, sweety, fruity. Oh, and it's incredibly simple to make.

Suck on that, Danny Tripp. You can't have any, but Conan is welcome to the entire thing.


Lime Berry Trifle
(adapted from The Pampered Chef's "Spring/Summer 2007 Season's Best Recipe Collection")

3 limes, washed
6 oz cream or nuefatchel cheese, softened
2/3 cup sweetened condensed milk (regular or fat free)
12 oz whipped topping (regular or reduced-fat)
1 qt. assorted fresh berries, washed and cut up, if needed
1 large, prepared pound cake or angel food cake

In a large mixing bowl, zest 1 lime. Squeeze the juice of 2 limes (including the zested lime) into the bowl. Cut remaining lime in half and slice one half into thin rounds; set lime rounds and untouched half aside.

Add cream/neufatchel cheese and condensed milk to the bowl; whisk to combine. Gently fold 2/3s of the whipped topping into the lime mixture until smooth. Taste; if needed, add more lime juice from reserved lime half.

Cut cake into 1-inch cubes. To assemble trifle, place half of the cake cubes into the bottom of a trifle bowl or other attractive clear bowl. Top with half the lime mixture and half of the berries. Arrange lime slices against inside of bowl to garnish. Repeat layers once more with remaining cake cubes, lime mixture, and berries.

Using the reserved whipped topping, cover the top layer of berries, smoothing as best as possible. If desired, use a pastry bag with a star tip and/or extra berries and lime slices for additional garnish.

Wednesday, June 27, 2007

Death By Chocolate

In looking for a dessert recipe to bring to a Fourth of July party, I came across the "Over-the-Top" Chocolate Passion .


The Chocolate Passion calls for a layer of brownies to be topped by a "pudding cake" (made with butter flavored shortening!) and two layers of chocolate cake, in the midst of which are chocolate chip cookies secured with canned frosting. More frosting is used to cover the whole shebang, which is then topped by chocolate chips, and chocolate covered strawberries.

I feel sort of dirty just reading the recipe. And at the same time, I want to make it. And eat it. And that makes me feel dirtier.

It reminds me of The Simpsons' "The Good Morning Burger."

"We take eighteen ounces of sizzling ground beef, and soak it in rich, creamery butter, then we top it off with bacon, ham, and a fried egg. We call it the Good Morning Burger."

-- Homer watches a television advertisement, " Bart's Friend Falls In Love"

Mmm ... fattening.

Grilled Corn with Lime and Cheese

Grilled Corn with Lime and Cheese served with Balsamic Marinated Skirt Steak.


"Grilled Corn with Lime and Cheese." It sounds fabulous, doesn't it? And there are elements that are good: kernels of fresh corn, sugars caramelized by high flame. The tart yet fresh juice from a good lime. The subtle heat from a dusting of chili powder has its place, too.

But I don't care for mayo dressing (yes, mayo) or the feta cheese. I like these ingredients separately, but together, they don't work for me.

I'm thinking, however, that grilled corn slathered in a lime-garlic or lime-chili butter would be great. And I'd like to try that with a sprinkling of finely grated cheddar or Monterrey jack cheese.

But not mayo and feta.

Grilled Corn with Lime and Cheese (cooking method slightly adapted)
4 ears of corn
2 tablespoons reduced-fat mayonnaise
1 tablespoon fresh lime juice
1/8 teaspoon chili powder
2 ounces finely grated feta cheese

Heat grill to medium. Remove corn husks and wrap cobs in aluminum foil. Cover and cook, turning occasionally, until kernels are tender, 15-20 minutes.

Combine reduced-fat mayonnaise, lime juice, and chili powder. Place cooked corn directly on grill for a bit of charring, if desired. Brush dressing on cooked corn. Dust with finely grated feta cheese. Season with coarse salt; serve with lime wedges.

Monday, June 25, 2007

SHF #32: Ooey-Gooey Peanut Butter Chocolate Brownies


When I was a kid, my favorite candy was Reese's Peanut Butter Cups. I couldn't get enough of that sweet yet salty, crumbly peanut butter middle, enrobed in Hershey's milk chocolate. Sometimes, I'd nibble the chocolate sides, leaving only a peanut butter center sandwiched by a thin layer of chocolate. I might pull the bottoms off with my bottom front teeth, leaving the exposed middle primed for licking. If I were impatient, I'd take a hearty bite, enjoying the feeling of harder chocolate co-mingling with a softer middle.

As I got older though, my chocolate-peanut butter cravings diminished. Sure, I'd enjoy a Reese's from time to time, or a scoop of chocolate ice cream with ribbons of PB, but my cravings took me elsewhere. (Primarily, to cookies.)

Until this year. January heralded a renaissance in peanut butter-chocolate love for me. Peanut butter cups? Yep. But even better are PB minuets, with super creamy centers covered in a more sophisticated chocolate. Or decadent brownies swirled through with rivers of peanut butter. Or, my new favorite, Chocolate Peanut Butter milkshakes from Abbott's Frozen Custard.

But, though we may not like to face it, food bloggers live in a real world where calories do count, and if I indulged my cravings as often as they'd like, I wouldn't be able to get out the door and get a milkshake.

So I found this Cooking Light recipe for Ooey-Gooey Peanut Butter Chocolate Brownies. They are good, but are not as decadent as they look (or should be). They're also chewy enough to pull out a loose filling, so watch out.

Still, if a raging Choco-PB craving hits you but you're not ready to blow the calorie bank, these will help you out. I brought them to a picnic, and they were among the first desserts to disappear from the table, so all in all, not a bad choice.

Ooey-Gooey Peanut Butter-Chocolate Brownies

3/4 cup fat-free sweetened condensed milk, divided
1/4 cup butter or stick margarine, melted and cooled
1/4 cup fat-free milk
1 (18.25-ounce) package devil's food cake mix
1 large egg white, lightly beaten
Cooking spray
1 (7-ounce) jar marshmallow creme (about 1 3/4 cups)
1/2 cup peanut butter morsels (plus more for garnish, if desired)

Preheat oven to 350-degrees F.
Combine 1/4 cup condensed milk, butter, and next 3 ingredients (butter through egg white) in a bowl (batter will be very stiff). Line a 13 x 9-inch baking pan with aluminum foil (allowing extra to hang over the sides for easy lifting later). Coat bottom of foil-lined pan with cooking spray. Press two-thirds of batter into prepared pan using floured hands or a rubber spatula; pat evenly (layer will be thin).

Bake at 350-degrees F for 10 minutes. Combine 1/2 cup condensed milk and marshmallow creme in a bowl; stir in morsels. Spread marshmallow mixture evenly over brownie layer. Carefully drop remaining batter by spoonfuls over marshmallow mixture. If desired, sprinkle extra peanut butter chips over marshmallow mixture. Bake at 350-degrees F for 30 minutes. Cool completely in pan on a wire rack. Lift out using foil, and cut into 24 brownies using a pizza wheel.

Yield: 2 dozen (serving size: 1 brownie)

CALORIES 176 (25% from fat); FAT 5g (sat 2.1g,mono 1.6g,poly 1.1g); PROTEIN 2.6g; CHOLESTEROL 6mg; CALCIUM 30mg; SODIUM 212mg; FIBER 0.8g; IRON 0.8mg; CARBOHYDRATE 29.9g

Cooking Light, SEPTEMBER 2000

Wednesday, June 20, 2007

Balsamic Marinated Skirt Steak

On the grill.

It's dishes like this that remind me why I love beef. So tender, so flavorful -- sweet and a little smoky, all anchored by the umami flavor of the steak. It's amazing. For a perfect meal, all this needs is a little side salad (maybe a classic iceberg with a drizzle of blue cheese dressing) and perhaps some corn on the cob.

On the plate.

One note: I cooked up 12 oz. and felt 3, 4 oz. servings were quite nice. Using this math, you could get 6 servings, not 4 as the recipe suggests, out of 24 oz. of steak. Having said that, Shane ate two servings.


Balsamic Marinated Skirt Steak
1/2 cup balsamic vinegar
2 tablespoons light-brown sugar
2 garlic cloves, minced
1 teaspoon crushed dried rosemary
Coarse salt and ground pepper
1 1/2 pounds skirt steak, cut crosswise into 4 equal pieces
Oil for grates

In a resealable plastic bag or shallow dish, combine vinegar, sugar, garlic, rosemary, 1 teaspoon coarse salt, and 1/2 teaspoon pepper. Pierce meat all over with a fork; add to marinade, and turn to coat. Let marinate at room temperature at least 15 minutes, or cover and refrigerate up to 1 day.


Heat grill to high; oil grates. Remove steaks from marinade, allowing excess to drip off. Grill steaks 2 to 4 minutes per side for medium-rare. Transfer to a plate; cover loosely with aluminum foil, and let rest 5 minutes. Serves 4.

Monday, June 18, 2007

Throw-It-Together-Almost-Seven-Layer-Dip


Written Saturday at 10:05 p.m.:

I have to bring a side to a picnic tomorrow, and all out of energy (Kian's birthday party was today and it was great, but we're exhausted, especially me, and I've got the I'm-tired-bitchies -- anyone looks at me crosseyed and I'm ready to rip their head off -- along with a clear case of stream-of-consciousness writing and an overuse of hypens and em-dashes) I went to the store, threw a bunch of ingredients in my basket and slapped a seven layer dip together (one with six layers). I think it will work.

Written Sunday at 4:42p.m.:

It worked: really, really well. The heat from the refried beans and salsa was tempered by the cool tang of the sour cream, the black beans added substance, and the guacamole added a fresh kick. If it hadn't been completely devoured, I'd be eating some right now.


Throw-It-Together-Almost-Seven-Layer-Dip

16 oz (1 container) sour cream
1 packet taco seasoning
16 oz (1 can) refried beans with jalapenos (or add some diced jalapenos to plain refried beans)
9 oz. (about 1 1/2 cups) guacamole (homemade or store-bought)
16 oz. (1 jar) black beans, drained
16 oz (1 jar) hot salsa
1 to 2 cups shredded "Mexican-blend" cheese (or a cheese of your liking)

In a small bowl, combine sour cream with about 75-percent of the taco seasoning. Taste, adding more seasoning, if desired.

In the bottom of a glass 10-inch pie plate, evenly spread the refried beans. Top with guacamole, black beans, salsa, and seasoned sour cream, evenly spreading each layer before adding another. Top with cheese; chill for several hours to allow flavors to meld. Serve with tortilla chips.

(Note: using lower fat products -- like low fat sour cream and fat free refried beans -- reduces the calories and fat in this recipe but retains the flavor. )

Thursday, June 14, 2007

UPDATED! From Retro, With Love: Retro Recipe Challenge No. 7 Round-Up

Let's take trip 'round the world, retro style, shall we?

Haalo from Cook (almost) Anything at Least Once offers a delicious "uber retro, Swiss-classic, fondue" perfect for any well-heeled jet-setter.


The recipe hails from Graham Kerr's classic 1973 cookbook, The Complete Galloping Gourmet Cookbook.


Retro pro Emily at Appetitive Behavior visited France via Hungary (read her post for the details) to create "Flaky, uberbuttery, layer-y, crisp on the outside and soft inside, and all told pretty darn awesome [croissants]." They look fabulously French (yet make me hungry for Hungary).

The recipe comes from the Illustrated Good Housekeeping Encyclopedic Cookbook, 1965, Vol. 3.


Theresa at Vintage Style Files (a woman & blog after my own heart) took a tour of the orient with her gorgeous Tokyo Salad. It's a "spicy Asian shrimp and noodle" salad hailing from Kitchen Fare, International Menus Cookbook, just the kind of book that inspired the RRC No. 7's theme.


Tara at the hilariously named Should You Eat That? (have you been looking in my fridge, Tara?) tantalizes the taste buds with Sweet and Sour Pork. She found a classic irony in retro recipes: turning something healthy into food that could take down an elephant.


"I found it amusing," Tara writes, "that [the recipe] required lean pork, which was then deep fried, but I suppose it is better than the alternative of 'fat' pork being deep fried."


Rachel at Coconut and Lime whets the palate and wets the tongue with her fizzy Moscow Mule, which is "credited with having popularized vodka in the United States" during the 1950s.


Having recently been to Russia, I can definitively say the Moscow Mule is vast improvement over the traditional Russian summertime drink, квас (kvas).


The Expat Chef in The Expatriate's Kitchen takes a turn updating a classic favorite, Spinach Artichoke Dip, with her Spinach Artichoke Tart in Puff Pastry.


She writes, "You can actually taste the vegetables now that your taste buds aren’t doing the backstroke in butterfat."


Last but not least, Gillian at Food History provides dessert with her Dundee Cake. Gillian writes, "This is another of those 1950s recipes from my grandmother. We used to make Dundee Cake a great deal in the late sixties, but I haven’t seen it anywhere recently. I think it’s time it was revived!"

And that's the tour of the globe! Thank you to all who participated! (If I've neglected to include a submission, please email me right away. Except you, porn site. We don't feature that kind of eating on this blog.)

If you're interested in hosting the next round of the Retro Recipe Challenge, please drop me a line!

Wednesday, June 13, 2007

Strawberry Rhubarb Marvelous Muffins


I picked up a copy of Joan Donogh's recipe for rhubarb muffins with a bunch of rhubarb at the Canandaigua Farmers' Market. I'd also picked up some strawberries so, with a couple of minor changes (can you guess the biggest one?) these became strawberry rhubarb muffins.

Extremely moist and flavorful, these muffins have a sweet brown sugar-cinnamon topping and mildly vanilla flavored base studded with fresh bits of rhubarb and strawberry. If you'd like more of a rhubarb bite, increase the rhubarb and decrease the strawberries, as long the total amount of vegetable/fruit comes to 2 cups -- or just use Joan's original recipe! (I've got some rhubarb left over, and I'm thinking that's just what I'll do.)


Strawberry Rhubarb Muffins (adapted from Now... You're Cooking!)

2 1/2 cups flour
1 teaspoon baking soda
1/2 teaspoon salt
1 1/4 cups packed brown sugar
1 egg
1/2 cup melted butter
1 cup buttermilk
1 teaspoon vanilla
1 cup chopped rhubarb
1 cup chopped strawberries

Topping:
1/2 cup packed brown sugar
1 tablespoon melted butter
1 teaspoon cinnamon

Preheat oven to 350-degrees F. In a large bowl, combine flour, baking soda, salt and brown sugar. In another bowl, beat the egg, stir in butter, buttermilk and vanilla.

Make a well in the dry ingredients, and add the egg mixture all at once. Stir until just blended. Fold in strawberries and rhubarb. Spoon into greased or paper-lined muffin tins.

For the topping, combine sugar, butter and cinnamon. Sprinkle a spoonful of topping over each muffin and bake 20 to 25 minutes.

Monday, June 11, 2007

Double Chocolate Cookies


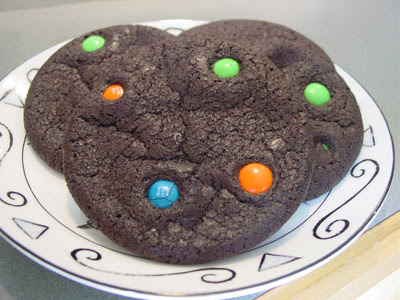
I love these cookies. They look so happy! And why wouldn't a chewy cookie with a deep chocolate flavor and bright spots of color make people happy?

A couple of notes:
1) these cookies taste best the day they're made.
2) to get a very round final product, after dropping the cookie dough on the sheet, place a square of parchment paper on top of the dough and, using a flat bottomed drinking glass, press down on the paper and dough gently but firmly.
3) for an especially pretty cookie, press a few additional M&Ms into the flatted cookie dough before baking.

Double Chocolate Cookies (adapted)

1 cup all-purpose flour
1/2 cup unsweetened Dutch-process cocoa powder
1/2 teaspoon baking soda
1/2 teaspoon coarse salt
4 ounces coarsely chopped good-quality milk chocolate
1/2 cup (1 stick) unsalted butter
1 cup M&Ms
1 1/2 cups sugar
2 large eggs
1 teaspoon pure vanilla extract

Preheat oven to 325 degrees. Whisk together flour, cocoa powder, baking soda, and salt; set aside. Using a microwave, melt chocolate with butter in a small microwave-safe bowl (use 30-second intervals, stirring in between "zaps.")

Put chocolate mixture, sugar, eggs, and vanilla in the bowl of an electric mixer fitted with the paddle attachment. Mix on medium speed until combined. Reduce speed to low; gradually mix in flour mixture. By hand, fold in M&Ms.

Using a 1 1/2-inch ice cream scoop, drop dough onto baking sheets lined with parchment paper or nonstick baking mats, spacing 2 inches apart. Bake until cookies are flat and surfaces crack, about 15 minutes (cookies should be soft). Let cool on parchment on wire racks. Cookies can be stored between layers of parchment in airtight containers at room temperature up to 3 days.

Monday, June 04, 2007

Green Garlic Pesto


Saturday was the first day of the Canandaigua Farmers' Market season. (yay!) There was only a smattering of booths but among them was Honeyhill Farms from Livonia, NY selling pickled garlic scapes (delicious!) and fresh green garlic.


Green garlic are the fresh shoots of the immature garlic plant (source). The woman I spoke to at the Honeyhill Farms booth suggested I use some to make pesto.

I'm so glad I did. The flavor is phenomenal! Spicy, intense, and fresh, this pesto will perk anything up. I'm planning to use it on pasta but I spread some on a Boca burger yesterday with fantastic results. And I've also topped a few tortilla chips with it. I'm not sure everyone would go for that, but I'm betting a thin spread of it would taste great on a cracker topped with cheese. And, come to think of it, maybe it could be mixed with a bit of sour cream and mayo for a veggie dip...

In an effort to cut down on the fat (however healthy) inherent in pesto, I adapted this recipe from Cooking Light. If you prefer, substitute the water for more Extra Virgin Olive Oil.

Green Garlic Pesto

6 shoots of green garlic, chopped into 2-inch pieces
1/4 cup pine nuts or walnuts
1/2 cup (2 ounces) grated fresh Parmesan cheese
3/4 teaspoon salt
1/2 teaspoon freshly ground black pepper
1/2 cup warm water
6 tablespoons extra virgin olive oil*

Drop green garlic through food chute with food processor on; process until minced. Place next 4 ingredients (nuts through pepper) in processor; process 10 seconds. Combine water and oil in a measuring cup. With processor on, slowly pour oil mixture through food chute, processing just until blended. Taste and adjust seasonings. Store in an airtight container in the refrigerator.

*If using on pasta, add more oil until the desired consistency is reached.

Sunday, June 03, 2007

From Russia, With Exhaustion (updated)

Links to more photos below.


I don't think it would be an exaggeration to say that our trip to Russia (visiting Moscow, St. Petersburg, and Borovsk) with the HWS Russian Study Tour was the most exhausting trip of my life.

We took an average of 20,000 to 30,000 steps a day, which (I'm told) translates into 10 to 15 miles. Additionally, it was around 90-degrees and few of us were prepared for the heat (exhibit A: wearing long pants in Red Square, above). And I can't effectively convey how difficult it is to navigate a place where you can barely speak or read the language, especially because the alphabet is so different from your own. (It did make me think quite a bit about communications theory, however, especially as it applies to the biblical story of the Tower of Babel.)

Having said that, we had a great time, especially because of the people we travelled with. I'm amazed at how well our group clicked. We rollicked with laughter the entire time -- even in a hostel with only one toilet and shower.

Click here and here for links to our pictures.


Itinerary with Commentary

Day 1 -- Monday, May 21. Afternoon flight from JFK Airport.
I don't remember if I've flown Delta before, but I'll be glad to again. While the seats were a bit small and the flight was long (8 1/2 hrs), the crew was amazing. We were treated well (even in coach) -- I even got three free drinks! (Two passion fruit mojitos and one small bottle of wine.)

Day 2 -- Tuesday, May 22. Moscow: Arrive Moscow a.m. Walking tour downtown.

We arrived at the airport around 10 am and between customs, the drive to the hostel (employees good, accommodations atrocious), and settling in, I think we hit the Red Square around 1 pm. It's between 85 and 90 degrees. The photo above is from this day. We also ate at a restaurant in Russia for the first time. Fortunately, I was able to point at pictures, as the menu was otherwise impenetrable. (Thanks for leaving me high-and-dry, Russian Studies professor and students! You know who you are.)

The seven women roomed together, sleeping on bunk beds. We left the windows wide open, trying to catch any stray breezes that blew our way. We felt sweaty, sticky, and dirty, a feeling that would not leave us until we returned home to our showers and air conditioning.

Day 3 -- Wednesday, May 23. Moscow: Kremlin museums, churches, Armory.

This is where things start to get fuzzy and my recollection of things starts to run together. Is this the day we hung out in the park under the trees, or was it the day before? I don't know. I do know that I liked the Armory with its display of czarist trappings (royal gowns, jewelery, coaches, and the famed Fabergé eggs).

As this was the first day going into the churches, it was also my first day having to wear a headscarf. Not a good look for me.

Day 4 -- Thursday, May 24. Moscow: Red October Chocolate Factory Tour, Cathedral of Christ the Savior, Banya

How sad is it that, out of everything else scheduled on the trip, I most looked forward to the chocolate factory tour? Anyway, it was kick-ass: we walked along the production line, sampling freshly made confections (lots and lots of samples) then retired to an air conditioned room (!!!) for tea and more candy. Awesome.

From there, we headed to Cathedral of Christ the Savior. It's a recreation of the original cathedral, completed in 1881. Stalin had it demolished in 1933 and a swimming pool was put in its place. Reconstruction began in the 1990s and was completed in 2000. On a 90-degree day in Moscow, I would have preferred the pool.

I got my wish, however, when we visited a banya. We had a private one all to ourselves, consisting of a large and cushy lounge area (decorated in a style befitting Hustler magazine) and the "pool" room, which featured a very hot sauna, a large, cool (and green hued) pool, plus a small cedar bath with icy water. I jumped from the sauna to the pool a few times (as is the custom) before deciding to just hang in the pool. Shane ordered a bottle of very crappy vodka, which tasted like rubbing alcohol and smelled like Sharpie markers (tm Mandi). Not tasty, but drinking it definitely put me in the banya mood. I also spent some time photographing the kitschy yet pornographic sculptures decorating the lounge. (Do I know how to have a good time, or what?)

Day 5 -- Friday, June 25. Borovsk. More TK...

Friday, June 01, 2007

RRC # 7 Extended to June 10


The deadline for RRC 7 has been extended to Sunday, June 10 at 11:59pm EST. All the more time for to whip up that '76 recipe for goulash that's been lying around.

We're Back!

...and we're exhausted. Seriously, Russia kicked my ass.

Details & pics to come!

Monday, May 21, 2007

Jumble of thoughts, plus a nudge about RRC#7


RRC#7's deadline for submission is in two weeks (Sunday, June 3 at 11:59pm EST); I'm looking forward to seeing what everyone comes up with!

We're in NYC right now, and visited L&B's Spumoni Gardens yesterday with my cousin Matt, his wife Catherine, and their new daughter Fiona (who is just adorable. I know everyone says that about babies, but let's face it, not all babies are - in fact, a lot aren't - but Fiona really is adorable.)


Anyway, the pizza is good, but the highlight was the spumoni: perfect little scoops of flavorful, creamy goodness piled into flexible paper cups. We ordered the rainbow spumoni (chocolate, vanilla, pistachio) but if we go back (it's kind of a schlepp), I'd just get a scoop of the chocolate and a scoop of the pistachio -- really, really great stuff.
Also, the people watching can not be beat.


So that's it: this will be the last post for a while (two weeks?) as Shane & I are flying to Moscow this afternoon for the tour. Wish us luck!

Tuesday, May 15, 2007

Pasta Toss with Tuna & Vegetables


About a week ago, Lis posted a gorgeous recipe on her blog for Pasta Shells with Italian Tuna, Grape Tomatoes & Baby Spinach. After wiping the drool from my lips, I knew I had to make it.

The only thing was that when I entered it into the WW points calculator, it said one serving equalled half my daily calorie allotment.

Now, it's not that I won't eat most my calories in on fell swoop. But I knew this recipe could be easily adapted for a lower calorie count and still be delicious and satisfying. (Also, I need to save mega calories for sweet splurges like the chocolate peanut butter milkshakes at Abbott's Custard.)

So, I first increased the total servings from four to six. Then, I swapped the traditional pasta for the whole wheat variety (I couldn't find whole wheat shell pasta, so I used rotini). Finally, I switched the Italian tuna packed in olive oil for tuna packed in water, though I used the kind that comes in a vacuum sealed pack rather than in a can. (Don't worry, not ALL the oil is eliminated.)

The result is an enticing dish, perfect for casual-yet-elegant al fresco dining.
I love that it's served warm yet is still light enough for warmer weather.

Pasta Toss with Tuna & Vegetables adapted from Lis' Pasta Shells with Italian Tuna, Grape Tomatoes & Baby Spinach


12 oz. whole wheat pasta (such as rotini or shells)
2 tsp. olive oil, plus more for drizzling to taste 2 garlic cloves, minced (or more to taste)
13 oz. albacore tuna packed in water, drained
1 10.5 oz. can of artichoke hearts, drained and cut in quarters
1 cup of grape tomatoes, sliced in half
1 bag of fresh baby spinach, about 6 oz.
1/4 c. of grated Pecorino Romano cheese
freshly ground black pepper to taste

Bring a large pot of water to boil for the pasta and follow the directions for cooking the pasta as listed on the box. When water comes to boil, salt it generously, then cook pasta according to package directions, until al dente.

Just after adding the pasta to the boiling water, heat 2 tsp. of olive oil over medium low to medium heat in a skillet large enough to incorporate all the ingredients (including the cooked pasta). Add garlic and saute until lightly golden. Add the tuna with the oil, artichoke hearts & tomatoes, sauteing until the tomato skins slightly wrinkle, about 3 minutes.

Just before your pasta is ready, add the baby spinach to the tuna mixture, folding in until the spinach is wilted.

Drain the pasta in a colander, reserving 1/2 cup of the starchy pasta water to make the sauce, and place the pasta in the skillet with the other ingredients. Then, sprinkle the Pecorino over everything and stir until well combined. If it's a bit dry, add a drizzle of olive oil and a bit of pasta water to the dish and stir. (Be careful not to use too much water or oil -- the dish shouldn't be too "wet.")

Finish the with a sprinkling of fresh pepper and some additional Pecorino Romano.

Serves 6.

Wednesday, May 09, 2007

Chicken Schnitzel


Shane spent a number of years in Germany as a kid, where he acquired a taste for schnitzel.

Kian and Sadie also picked up on his love of schnitzel and, to be honest, so did I. Veal or pork pounded thin, dredged in a seasoned flour, fried and served with lemon wedges? Nothing wrong with that!

Except maybe the frying part. Which, you know, tends to add width to one's ass.

Fortunately, Cooking Light has a recipe for chicken schnitzel, incorporating Dijon mustard, fresh herbs and Parmesan cheese which distinguishes it from a typical chicken cutlet.

The result is a flavorful, tender and moist dish -- it was wonderful. Serve with lemon wedges and lovely little salads (potato, cole slaw, etc).


Easy Schnitzel
4 (6-ounce) skinless, boneless chicken breast halves
1/4 teaspoon salt
1/4 teaspoon freshly ground black pepper
2 tablespoons all-purpose flour
2 tablespoons Dijon mustard
1 large egg, lightly beaten
1/2 cup dry breadcrumbs
1 1/2 tablespoons grated fresh Parmesan cheese
2 teaspoons finely chopped fresh parsley
2 teaspoons chopped fresh chives
1 garlic clove, minced
1 tablespoon olive oil
4 lemon wedges (optional)

Preheat oven to 350°.
Place each chicken breast half between 2 sheets of heavy-duty plastic wrap; pound to 1/2-inch thickness using a meat mallet or rolling pin. Sprinkle chicken with salt and pepper.

Place flour in a shallow bowl. Combine mustard and egg in a shallow dish. Combine breadcrumbs, cheese, parsley, chives, and garlic in a shallow dish. Dredge 1 chicken breast half in flour, turning to coat; shake off excess flour. Dip in egg mixture; dredge in breadcrumb mixture. Repeat procedure with remaining chicken, flour, egg mixture, and breadcrumb mixture.

Heat oil in a large ovenproof nonstick skillet over medium-high heat. Add chicken; sauté 2 1/2 minutes or until browned. Remove from heat. Turn chicken over; place pan in oven. Bake at 350° for 10 minutes or until chicken is done. Serve with lemon wedges, if desired.

Yield: 4 servings (serving size: 1 chicken breast half)

CALORIES 328 (22% from fat); FAT 8.1g (sat 1.9g,mono 3.8g,poly 1.3g); PROTEIN 45.3g; CHOLESTEROL 153mg; CALCIUM 85mg; SODIUM 636mg; FIBER 0.7g; IRON 2.6mg; CARBOHYDRATE 16.7g

Tuesday, May 08, 2007

Nutella S'mores


We had marshmallows. We had graham crackers. We had a campfire and long, lean sticks.

But no chocolate. Nutella was an excellent stand-in. In fact, I think I prefer it...


Nutella S'mores

1 graham cracker, broken in half
1 well toasted marshmallow (lightly browned on the outside, flowing and hot on the inside)
about two teaspoons of Nutella (more or less to taste)

Spread the Nutella on one half of the graham cracker. Top with marshmallow, followed by the other half of the cracker. Smoosh down and enjoy.

Wednesday, May 02, 2007

Deep Dish "Pizza"


Shane has spent some time in Chicago recently for job training. While there, he fell in love with deep dish pizza. It wasn't enough for him to enjoy his culinary discovery, he had to call me and taunt me with it. Repeatedly.

Look, I'm a New Yorker. I was born in Beth Israel, grew up on Long Island, went Marymount Manhattan College, followed by grad school at NYU, and now I live in Upstate NY (roughly defined by "down-staters" as anything north of Westchester. I tend to agree).

So, while I know Chicago style "pizza" is delicious, I don't consider it pizza. It's more of a casserole lined with pizza dough, or as Sadie described it, "lasagna with crust."

Is it good? Yes. Is it pizza? Uh, no. This, this, this, and this is pizza. This is not.

Let the wrath begin.

Despite my feeling on this, I promised Shane I would make deep dish whatever it is for him. So I did, using a Cooking Light recipe and substituting Wegman's pizza dough. But I used far too much dough, hence the puffiness of the crust.

The verdict? Very good and I'd make it again, either using the original dough recipe or using much (much) less premade dough.

But I'm not calling it pizza.

Deep Dish "Pizza"

Dough:
1 teaspoon sugar
1 package dry yeast (about 2 1/4 teaspoons)
1 cup warm water (100° to 110°)
3 cups all-purpose flour (about 13 1/2 ounces), divided
1/4 teaspoon salt
Cooking spray

Topping:
1/2 pound turkey Italian sausage (about 2 links)
1 cup finely chopped onion
1 (8-ounce) package presliced mushrooms
1 1/2 teaspoons olive oil, divided
3 garlic cloves, minced
1 tablespoon tomato paste
1 teaspoon dried oregano
1/4 teaspoon fennel seeds, crushed
2 (8-ounce) cans tomato sauce
1 tablespoon cornmeal
1 1/4 cups (5 ounces) preshredded part-skim mozzarella cheese
2 tablespoons grated fresh Parmesan cheese

To prepare dough, dissolve sugar and yeast in warm water in a large bowl; let stand 10 minutes. Lightly spoon flour into dry measuring cups; level with a knife. Add 1 cup flour and salt to the yeast mixture, stirring with a whisk until well combined. Stir in 1 3/4 cups flour, stirring until a dough forms. Turn dough out onto a lightly floured surface. Knead the dough until smooth and elastic (about 8 minutes); add enough of remaining 1/4 cup flour, 1 tablespoon at a time, to prevent dough from sticking to hands (dough will feel sticky).

Place dough in a large bowl coated with cooking spray, turning to coat top. Cover and let rise in a warm place (85°), free from drafts, 1 hour or until doubled in size. (Gently press two fingers into dough. If indentation remains, dough has risen enough.) Punch dough down; cover and let stand 5 minutes.

Preheat oven to 375-degrees.

To prepare topping, heat a large nonstick skillet over medium-high heat. Remove casings from sausage. Coat pan with cooking spray. Add sausage and onion; cook for 5 minutes or until sausage is browned, stirring to crumble. Drain; set sausage mixture aside.

Return pan to medium-high heat. Add mushrooms; cook 5 minutes or until moisture evaporates, stirring frequently. Remove mushrooms from pan, and set aside.

Return pan to medium heat; add 1 teaspoon olive oil. Add garlic; cook 30 seconds or until lightly browned, stirring constantly. Add tomato paste; cook 1 minute, stirring frequently. Stir in oregano, fennel, and tomato sauce; simmer for 5 minutes or until sauce mixture is slightly thickened.

Coat a 12-inch cast-iron skillet with remaining 1/2 teaspoon oil, and sprinkle cornmeal over oil. Place dough in skillet, gently stretching edges to evenly coat bottom and sides of pan. Sprinkle mozzarella evenly over the bottom of dough; top evenly with sausage mixture and mushrooms. Top mushrooms with sauce mixture; sprinkle Parmesan over sauce. Bake at 375-degrees for 40 minutes or until crust browns and topping is bubbly. Let pizza stand 10 minutes before serving.

Yield: 8 servings (serving size: 1 slice)