Thursday, April 27, 2006

Crockpot Lasagna

It sounds terrible, doesn't it? Crockpot lasagna? Who would eat that? Maybe someone who thinks Chef Boyardee is a culinary genius, but not someone who has functioning tastebuds.

And if there's anybody in your family from Italy, you're probably planning to put a hit on me right now.*

But please trust me: this is a great recipe -- especially the second day, after the flavors have melded together -- and it's very simple.

Honestly, I wish I made some yesterday so that we had it to eat for the next few days, while we're running around like chickens with our heads cut off. (As a side note, I probably won't have another post until next week for that very reason -- we are so friggin' busy.)

Crockpot Lasagna

1-1/2 lb. ground beef
1 medium onion, chopped
2-3 cloves garlic, minced
Box of lasagna noodles (You won’t use the whole box) , raw & roughly broken into thirds (but they’ll shatter)
2 ½ jars of spaghetti sauce
1/3 cup water (if needed)
2 lbs ricotta (or less, I probably used 26 oz.)
2 cups (or more) shredded mozzarella

In a skillet, brown ground beef; remove from pan and set aside. Using about 1 ½ Tbs. of fat from beef, cook onion over medium to medium-high heat until translucent. Add garlic and continue cooking (don’t let it burn). Turn off heat and return beef to pan; stir to combine with onion and garlic.

In the bottom of a greased crockpot (6qt), place a thin layer of sauce . Cover with a layer of broken lasagna noodles. Top noodles with more sauce, some beef, ricotta, mozzarella and more sauce. Repeat until you have run out of beef and cheeses (2 to 3 more times). Add a final layer of noodles, top with plenty of sauce, stretching with water if needed. Cover and cook 5 hours on low, or 2-2 ½ hours on high.

Serves approximately 12. Individual portions reheat well in the microwave.


Grade: A

*Back off. I'm Italian. We can make these jokes.

Monday, April 24, 2006

Simple Bread Pudding

When life gives you stale bread, make bread pudding.


A loaf of French bread lay on top of our bread box, staring at me. It was at least 4 days old and as hard as a rock.

I’d planned on serving it with some lemon spaghetti but we wound up eating out – three nights in a row – so by the time I did cook up the pasta, the bread was seriously stale.

Bread pudding, redeemer of hard bread, to the rescue.

This is such a comfort food, especially when warm. The pudding is lightly sweetened and the flavors are mild but it’s really delicious. It’s also very filling; I wanted a second helping but I'm too stuffed to actually have one.

Next time, I’ll try substituting the white sugar for brown.

Recipe adapted from Digs Magazine

Simple Bread Pudding

A loaf of stale bakery bread, torn or cut into 1-inch bread cubes
3 cups milk, half-n-half, or a combination of both
1/2 stick butter (4 Tbsp.)
1-1/2 tsp. ground cinnamon
1/2 c. sugar
2 tsp. vanilla
3 eggs
Extra sugar and cinnamon for sprinkling on top

Preheat the oven to 350-degrees and butter an 8-inch square baking pan. Toss the milk, butter, cinnamon and sugar into a saucepan, and heat gently over medium heat until the butter has melted. Remove from heat and stir in vanilla.

Place bread in a large bowl. Pour the milk mixture over the bread, making sure to cover all the bread. Weigh the bread down by placing a plate or pan on top of the mixture, held down with a few cans from the cupboard. Let sit for about five minutes, making sure the bread gets good and soaked.

Beat the eggs and pour on top of the bread mixture; stir to thoroughly combine. Pour mixture into 8-inch pan and sprinkle with sugar and cinnamon.

Place the pan into a larger baking dish and place in the oven. Add enough hot water to the larger dish until the water reaches about an inch from the top.

Bake for 45-70 minutes. The pudding will be puffy and golden when it's done; when a knife stuck into the center comes out fairly clean, the pudding is done.

Enjoy it warm (with vanilla ice cream) or cold. Bread pudding keeps well for a couple of days; just cover and store in the fridge.

Grade: A

Sunday, April 23, 2006

Brown Sugar Chocolate Chip Cookies


When it comes to chocolate chip cookies, I like them thin, crisp, and buttery. That way, even a bite without a chocolate chip is still a delicious one.

This recipe fits that description to a tee. (I make them without the chips for Kian, my chocolate-abhoring stepson.*) As always, chocolate chip cookies are best enjoyed with a tall glass of icy-cold milk.


Alexis'** Chocolate Chip Cookies

4 sticks unsalted butter, room temperature
3 c. packed light-brown sugar
1 c. granulated sugar
4 large eggs
2 tsp. vanilla extract
3-1/2 c. flour
1-1/2 tsp. salt
2 tsp. baking soda
1-1/2 cups semi-sweet chocolate chips

Preheat oven to 375-degrees. Line two baking sheets with parchment; set aside. Cream butter until smooth; add sugars, and beat until smooth. Beat in eggs and vanilla. Into a large bowl, sift together dry ingredients. Slowly beat dry ingredients into wet mixture. Fold in chocolate chips.

Drop 2 to 3 tablespoons dough per cookie onto prepared baking sheets; space dough at least 2 inches apart to allow for spreading. Bake until golden, 8 to 10 minutes. Remove cookies from baking sheets, and allow to cool on baking racks.

Grade: A

*Yes, he was dropped on his head as a baby.
**Martha Stewart's daughter.


Tags: , , , , ,

Saturday, April 22, 2006

Giada's Lemon Spaghetti


AliCat over at Something So Clever made this and gave it a thumbs up, so I thought I’d give it a try. It’s very good – a light, summery meal. And so very easy to make. (I didn’t add any basil because I forgot to buy some; it was still delicious.)

Giada De Laurentiis’ Lemon Spaghetti

1 lb. spaghetti
2/3 c. olive oil (I used extra virgin)
2/3 c. grated Parmesan
1/2 c. fresh lemon juice (2-3 lemons)
Salt and freshly ground black pepper
1 Tbs. lemon zest
1/3 c. chopped fresh basil leaves

Bring a large pot of salted water to a boil and cook pasta until it is tender but still firm to the bite, stirring occasionally, about 8 minutes. Whisk the lemon juice, oil, and Parmesan in a bowl to blend.

Drain the pasta and reserve approximately 1 c. of the pasta water. Toss the pasta with the lemon sauce, and pasta water, adding 1/4 c. at a time as needed to moisten. Season with salt and pepper. Garnish with lemon zest and chopped basil.

Grade: A

No-Bake Key Lime Pie

The color here is off; the pie really has an off white color. The lime juice isn't strong enough to change the color and there are no eggs to add a yellow tint. Food coloring could easily give the pie more of a lime hue.

Somewhere, I’d read that “real” key lime pie is not baked. (Of course, this happened while my first key lime pie was in the oven.)

This recipe meets that criterion – sort of. The crust is baked but since all the key lime pie recipes I’ve seen call for a “prepared graham cracker crust,” I gave it a pass.

Although this key lime pie recipe seems easier than the other, it really isn’t; hand squeezing key limes is time-consuming. Which recipe you choose depends on the kind of pie you want to eat: one with a lighter, whipped texture or one more similar to a custard.

One thing I didn’t like about this was the scent it gave off while mixing. The condensed sweetened milk has an unfortunate cheese aroma, not something I want to associate with a lime dessert.

In the end though, the pie had a good lime taste -- not too sweet, not too tart.

The filling is adapted from a recipe in How to be a Domestic Goddess by Nigella Lawson; the crust is the same used in Pepe’s Key Lime Pie.


No-Bake Key Lime Pie

Crust:
1-1/2 c. graham cracker crumbs (about 8)
1 stick unsalted butter, melted
1/4 c. white sugar
1 tsp. cinnamon

Preheat oven to 325-degrees. Mix dry ingredients together thoroughly; add butter and mix to combine. Press into 8 or 9 inch pie pan. Bake about 10 minutes; allow to cool completely before filling.

Filling:
1/2 cup of key lime juice
Zest from 7-8 key limes
14-oz sweetened condensed milk
1 c. heavy cream

Using a stand or hand mixer, whisk together all ingredients in a large bowl until thick and creamy. Pour into cooled pie crust and chill for 30 minutes or until set.

Grade: B+ to A-

Monday, April 17, 2006

Pepe's Key Lime Pie


After finding Key limes at the local grocery store, I decided to make a Key lime pie for Easter dinner. Since we're in NYC for Easter, I made the pie in an unfamiliar kitchen (my parents'). I say this because making this gave me more trouble than it should have. I'm attributing most of that to the fact I wasn't in my home kitchen.

For the graham cracker crust, I added a bit more melted butter (maybe 2 Tbs.) than the recipe called for as the mixture seemed too dry. I guess it didn't matter much: once I placed everything in the pie plate, the crumbs were simply pushed up the sides of the plate by my patting the crumbs in the center -- no real sticking necessary.

As for the filling, I suspect that using fresh key limes tastes better than using bottled juice, but squeezing those little bastards is a pain in the arse. Key limes are about the size of ping pong balls and, to generate a 1/2 cup of juice, my Dad and I squoze about 20 limes.

Incidentally, there is a flavor difference between Key limes and Tahitian limes: key limes are less tart, resulting in mellower pie. I can't help but think, though, that Tahitian limes could be used if they were cut with a bit of water. Or, if you wanted to go off the map a bit, blended with another citrus juice.

Until the stiff egg whites are added, the juice, evaporated milk and egg yolks don't look like much. But incorporate the egg whites and --poof-- enough volume to fill the crust.

I was a little concerned about over baking the pie and browing the top. Of course, I thought the bake time was 25 minutes, not 20, so I left it in for 23. Fortunately, the top of the pie was dry yet wiggled gently when I shook the plate. And, no brown spots.

It tastes pretty good, too. I'm not a real lime fan (which begs the question, "Why did you want to make key lime pie in the first place?" to which I'd answer, "Because I was able to buy key limes in Upstate New York.") but this is nice: a gentle zing from the citrus, offset by the whipped cream and graham cracker crust.

And the crust is really good. But since it's made of graham crackers, cinnamon, sugar and melted butter, I suppose that shouldn't really suprise. I could just eat the crust and be happy.

Another bag of Key limes remains -- and another Key lime pie recipe is in the works.


Pepe's Key Lime Pie

Crust:
1-1/2 c. graham cracker crumbs (about 8)
1/3 c. melted butter
1/4 c. white sugar
1 tsp. cinnamon

Preheat oven to 325-degrees. Mix ingredients together and press into 8 or 9 inch pie pan. Bake about 10 minutes; allow to cool completely before filling.

Filling:

4 egg yolks
2 egg whites
1 14oz. can sweetened condensed milk
1/2 c Key Lime juice, fresh or bottled

Preheat oven to 325-degrees Beat egg whites until stiff. Set aside.

In another bowl, beat egg yolks well. Add sweetened condensed milk and continue beating. Slowly add key lime juice while beating. Fold egg whites into egg yolk mixture with spatula, being careful not to deflate the egg whites; mixture should be evenly blended.

Pour into pie crust. Bake about 20 minutes or until just set. Cool completely before refrigerating. Refrigerate at least 2 hours before serving. Makes 6 slices. Top each with whipped cream. Keeps well for up to 3 days.

Whipped Cream:

2 c. (1 pint) heavy whipping cream, cold
1 tsp. vanilla extract
4 tsp. confectioners' sugar

Just before serving, make the whipped cream. In a large chilled bowl, using an electric mixer with a whisk attachment, beat the heavy cream until soft peaks. Add the vanilla extract and confectioners' sugar and continue to beat until stiff peaks.

Grade: A

Tags: , , , ,

Thursday, April 13, 2006

Spring Break


We've leaving for NYC tomorrow to visit my parents for Easter, so things will be slow around here until we come back (...maybe; I made
Q Cookies on the last trip). I want to hit up the new Trader Joe's, Whole Foods and, of course, Veniero's (plus other non-food-related locales).


I plan to make an authentic Key Lime Pie -- real Key limes, baby!-- this weekend; I've been dying to since I found a few bags at my grocery store the other day. Until I post the results (here's hoping it's good) check out this NY Times travel article on Florida and Key Lime Pie.


Happy Spring!

Tuesday, April 11, 2006

Not Recipe, Commentary


Today's Fresh Air featured journalist Michael Pollan discussing his new book "The Ominivore's Dilemma." In the interview, Pollan talks about the global costs involved in producing food. For example, corn -- found in a number of processed foods in the form of corn syrup -- is produced using an unbelievable amount of fossil fuel (meaning, it's not just our cars that are sucking up the world's supply of oil and oil by-products, so is that corn-syrup fortified french fry I ate with lunch).

Additionally, Pollan examined the business of organic food; while it's better than the food turned out on
factory farms, a number of organic food producers have simply taken the factory farm model and applied it to organic farming. Which, if you're like me and try use organic foods whenever possible, is more than a little disturbing.

Finally, Pollan makes an interesting inference based on recent market developments. Sales figures show that more consumers are buying organic foods. Out of all the grocery store chains in America, the one with the greatest growth is
Whole Foods. Based on this, Pollan believes that more people are concerned about where their food comes from and desire a greater connection with what they eat. For example, buying a burger from McDonald's requires very little thought on the part of the consumer, yet if a person purchases the raw elements of their food (say, a chicken breast, dijon mustard and scallions) and creates a meal with them, their engagement with the food chain, their part in it, and therefore nature, is much greater. Pollan notes that eating is our most frequent connection with the natural world. If you think about food not as something pre-fab from a box but as a living thing that we are harvesting to sustain ourselves (whether it's a cow or a carrot), that connection becomes all the more clear.

Perhaps this is why, at a time when our lives seem busier and our world more irrational, so many people retreat to the comforts of their kitchens: cooking from scratch puts us in touch with a slower -- and dare I say? -- more natural way of life.

Baked French Toast (aka Pain Perdu Cuit Au Four*)

Garnished with a bit of powdered sugar and glazed pecans.


Another recipe from Gourmet’s "Everyday Meals." Theirs did not include cinnamon but I added it anyway – it seemed like a good idea.

I used two 9-inch pie plates instead of a 13x9 baking dish (my 13x9 was on a 6 month sabbatical at a friends' house but this evening, sent in a purple glass replacement. Yay!). I also forgot to butter the baking dish; ditzyness strikes again.

I’m not a big fan of regular french toast as the consistency of soggy bread doesn’t do it for me. I enjoyed this though, as the bread's crust had a nice crunch to it. (Some parts of the bread – those that weren’t so stale? – were still too soft for my liking.) There’s also a custard that forms between the pieces of bread which was tasty, although I’d increase the amount of sugar to remove any similarity between it and scrambled eggs.

It’s a very filling breakfast; two pieces and a glass of cold milk are more than enough to sate the appetite.

Baked French Toast

Butter for baking dish
1 French baguette a day old, cut on a diagonal into 3/4-inch pieces
3 cups half & half or whole milk
3 eggs
1 tsp vanilla
1/2 tsp. cinnamon, plus more for sprinkling (optional)
1/4 tsp salt
3 Tbs. sugar

Combine half & half, eggs, vanilla, salt and 2 Tbs. sugar; mix well. Butter a 13x9-baking dish. Arrange bread in one layer in the dish and cover with mixture. Let stand 30 minutes at room temp turning once or twice. While the bread is soaking up the liquid, set oven to 425-degrees with a rack in middle position.

After 30 minutes, sprinkle top evenly w. remaining sugar (plus cinnamon, if desired). Place on the middle rack and bake until custard is set and top is golden brown, 30 to 35 minutes. Serve with maple syrup, powdered sugar, or jam.

Grade: (as rated by the Family judges): B+ to A-

*Still have no idea how to write French properly.


Monday, April 10, 2006

Hoisin and Honey Glazed Pork Chops with Three Pea Stir-Fry

These recipes come from Gourmet's "Everyday Meals,"
a cookbook that accompanies a Gourmet subscription.

I don't usually think of myself as ditzy, yet lately, all evidence points to the contrary. There were supposed to be scallions -- diagonally cut for maximum effect -- with the pork chops and, although I know I put them in my grocery cart, they did not make it to my kitchen. I did this with apples a few weeks ago, too. I like to imagine both of them are swirling around in a culinary Bermuda Triangle.

Then, just before placing the pork chops in the oven, I realized I'd left out the ginger. I pulled the chops out of the oven, scrambled around to mix the ginger in with the sauce, and popped the whole thing back in -- only to realize that the sauce already had ginger in it. I had added the ginger designated for the peas.

And yet even with the mishaps, both dishes came out very well. The extra ginger in the chops didn't overwhelm the sweet Asian barbecue flavor, nor did it scorch under the broiler. Both good things.

As for the peas, my version is actually Two Pea Stir-fry as my grocery store didn't have sugar peas in stock. It was still very good -- very little effort and lots of flavor. I served up both with a scoop of rice.


All in all, a tasty meal.


Hoisin and Honey Glazed Pork Chops
Serves 4

1 bunch scallions
1/2 cup Asian Oyster Sauce
2 Tbs. Dijon Mustard
2 Tbs. hoisin sauce
1 tsp. fresh ginger, peeled and finely grated
2 Tbs. honey
1 Tbs. soy sauce
4 pork chops (2 lbs. total)

Put oven rack in middle position & preheat to 400-degrees. Cut scallions diagonally in 2-inch pieces. Whisk together remaining ingredient except port in a large bowl. Add scallions to pork, turning pork to coat generously with sauce.
Arrange chops in 1 layer in a 15 by 10-inch shallow baking pan, 1-inch deep. Spoon remaining sauce w. scallions over pork & roast until just cooked through, 15 to 20 minutes
Turn on broiler and broil pork 5 to 6 inches form heat until top is slightly caramelized, 2 to 5 minutes. Let stand, uncovered, for 5 minutes. Serve chops topped with pan juices.


Three Pea Stir-fry
Serves 4

1 Tbs. veggie oil
1 large garlic clove, minced
1 Tbs. fresh ginger, peeled and finely chopped
1/4 tsp. dried hot pepper flakes
6 oz. sugar snap peas, trimmed and cut diagonally into 1-inch pieces
6 oz. snow peas, trimmed and cut diagonally into 1-inch pieces
1 cup frozen peas
1 tsp. soy sauce
1 tsp. Asian sesame oil
1 Tbsp. sesame seeds, toasted
Salt to taste

Heat oil in a 12-inch nonstick skillet over medium-high heat until hot but not smoothing, then stir fry garlic, ginger, and red pepper flakes until fragrant, about 1 minute. Add sugar snap and snow peas and stir-fry until crisp-tender, about 3 minutes. Add frozen peas and cook until hot, about 2 minutes.
Remove from heat and stir in soy sauce and sesame oil. Sprinkle with sesame seed and season with salt.

Grade: A (chops & peas)

Saturday, April 08, 2006

Grand Marnier Brownies

Mmm, mmm good.

This recipe was a challenge. I wanted to create something that would be eligible for the next Sugar High Friday; this month’s theme requires that all desserts incorporate liquor into the recipe.

My initial thought was baba rhum. But then I read Chandra’s instructions: “let's try to stay away from the ever popular rum cake...”

Damn it.

Ok, on to brownies. A friend’s sister makes delicious frosted mint brownies – the base is cakey, the frosting is nicely minted – so I thought I could simply substitute the peppermint extract with Crème de Menthe. But I first needed make a brownie base. I didn’t care for the first one I tried, so I upped the chocolate factor. The brownie recipe below is the result.

Then I moved to the frosting. Adding a teaspoon of Crème de Menthe in place of the extract did nothing – the frosting still tasted like confectioner’s sugar. So I kept adding liquor until I wound up with a something that couldn’t be set near an open flame.

At that point, I decided to go in a different direction.
How about a chocolate orange frosting flavored with Grand Marnier? Finally – finally! – a winner.

Alone the brownies are great; with melted chocolate and cocoa in the batter, plus chocolate chips to up the ante, how could you go wrong?. But top them with chocolate orange frosting – which gains fruity notes and brightness from the orange zest and juice, decadence from yet more chocolate and cocoa powder, and sophistication from the Grand Marnier – and you’ve got a fantastic brownie. Really, the word brownie doesn’t do this dessert justice. It’s a broWOWnie (…or something far more clever).

Go on. Make it for your next dinner party or date that you want to impress, and watch people fall on the floor with jubilation.


Grand Marnier Brownies

For the brownies:

1 and 1/2 sticks unsalted butter
12 oz good-quality semisweet chocolate, coarsely chopped or chips*
1/2 c. unsweetened cocoa powder (not Dutch-process)
1-1/2 cups all-purpose flour
1/2 teaspoon baking powder
1/2 teaspoon salt
2 cups sugar
4 eggs
1 Tbsp plus 1 tsp. pure vanilla extract (or 2 tsp. vanilla and 2 tsp. Grand Marnier)
1 cup semisweet chocolate chunks or chips


Preheat oven to 350-degrees. Line two 8-inch square baking pans with foil, allowing for 2 inches of overhang. Grease foil, excluding overhang.

Place butter and 12 oz. chocolate in a microwave safe bowl and microwave for 1 minute at 40-percent power; stir. Continue microwaving at 30-percent power in 30 second intervals, stirring every 30 seconds, until chocolate and butter have melted. Stir in cocoa and let cool slightly.

In a separate bowl, whisk together flour, baking powder, and salt; set aside.

Place sugar, eggs, and vanilla in the bowl of an electric mixer fitted with the whisk attachment and beat on medium speed until pale, about 4 minutes. Add chocolate mixture; beat until combined. Add flour mixture and beat, scraping down sides of bowl until well blended. Fold in cup of chocolate chips.

Scoop batter into prepared pans (it will be very thick), smoothing the top as best you can with a rubber spatula. Bake until a cake tester inserted into the brownies comes out with a few crumbs but is not wet, about 35 minutes. Let cool in pan for 15 minutes and then, using the foil lift brownies out of pan. Place on a cooling rack and allow to cool completely.


For the frosting:

3 oz. semisweet chocolate, chopped or chips
1/4 cup unsweetened cocoa powder
4 Tbsp. freshly squeezed orange juice
Water as needed
3/4 cups unsalted butter, room temperature
2 cups powdered sugar, divided
1-1/2 tsp grated orange peel
1 tsp vanilla extract
1/4 teaspoon salt
1-1/2 tsp. Grand Marnier

Melt chocolate in a microwave safe bowl at 40-percent power for 1 minute; stir. Continue microwaving at 30-percent power in 30 second intervals, stirring every 30 seconds, until chocolate has melted. Cool until lukewarm.
Mix cocoa powder and orange juice until smooth and thick but pourable, adding water by teaspoonfuls if necessary.
Beat butter, 1/3 cup powdered sugar, and orange peel in large bowl to blend. Add melted chocolate, vanilla, and salt; beat until smooth. Scrape sides of bowl; beat in cocoa mixture. Gradually add remaining powdered sugar and beat until frosting is smooth, scraping bowl’s sides frequently. Add Grand Marnier.

To assemble:
When brownies are completely cool, lift out of pans using foil; peel away foil and throw away. Smooth frosting over the brownies; garnish with chocolate curls, stripes made with melted chocolate, or orange zest. Cut into small squares, eat, and die happy.
Grade: A+

*I used Ghirardelli’s 60% Cocoa Bittersweet Chocolate chips throughout this recipe.

Thursday, April 06, 2006

Clueless Gourmet Brownies

You can tell by the color that these lack a deep chocolate flavor.

I bought The Clueless Gourmet cookbook several years ago and, soon after purchasing it, made its brownies more a number of times. And then, for whatever reason, never made them again.

When I want a brownie now, I just doctor a very dark chocolate brownie mix by adding a half-bag of dark chocolate morsels and a half-cup to a cup of chopped nuts (walnuts or pecans) and bake to the chewy brownie directions (not cake-like) brownie directions. They're effortless and delicious.

But I'm trying to perfect a new frosted brownie recipe and I don't want to use a box mix. As a result, fond memories turned me back to the Clueless Gourmet. No chocolate chip or nut additions here -- I thought they'd distract from the flavors in the frosting.

As it turns out, it doesn't matter: I'm not using this brownie recipe for my frosted brownie plans. It's not they're it's not tasty -- they are -- but it doesn't have the deep chocolate flavor I'm looking for. Is it because I used the Scharffen Berger again? Maybe. When I eat a brownie, I want it to be sinful. These don't do that for me. The chocolate notes here are less of a deep, rich chocolate and more of a light cocoa.

Again, this is a good recipe. It does have a nice butter flavor not normally identifiable in brownies. Should you make these? Sure, especially if you don't have a lot of experience in the kitchen. There's a lot to be said for uncomplicated recipes.

They'd be overwhelmed, however, by the brownie frosting I plan to make, and that's a dealbreaker. Back to the drawing board.

Clueless Gourmet Brownies

2 oz. unsweetened chocolate, chopped
1 stick unsalted butter, in 3-5 pieces
1 c. sugar
2 eggs
Pinch of salt
1/2 tsp vanilla
1/2 c. flour
1/2 c. chopped nuts (optional)

Preheat oven to 350-degrees. Line an 8-inch square pan, or 9-inch cake pan or pie plate, with parchment. Place chocolate and butter in a bowl and microwave for about a minute; stir. Continue microwaving at 30 second intervals at 50-percent power, stirring after every 30 seconds until everything is melted.

In the bowl of a stand mixer, beat the eggs and sugar for about a minute. Add the salt, vanilla and melted chocolate to the egg and sugar mixture. Stir until well blended. Fold in flour; when just combined, pour batter into pan.

Bake for 20 to 30 minutes until edges and top appear cooked and a cake tester inserted in the center comes out almost dry. Cool completely on a cooling rack.

Grade: B

Tuesday, April 04, 2006

Patate Douce Casserole Avec Peeps


Sissy William's recipe for Sweet Potato aux Peeps sparked the idea for both this recipe and its French title* (food sounds so much better in French).

I love the caramel-like sweetness baking releases in sweet potatoes, so to play that up, I added good amounts of brown sugar (3/4 cup) and butter (6 Tbsp.) to the mashed sweet potatoes. I'm also in love with the warmth, complexity, and aroma spices bring to recipes and since cinnamon, ginger, nutmeg, and cloves complement sweet potatoes so well, I threw them in, too. The result is heady; I know something is good if I have to tear myself away from licking the bowl. (Which is not to say I didn't lick the bowl; I just stopped myself from burying my face in it.)

As for the peeps, the oven changes their consistency; like roasting a marshmallow over a campfire, the dry heat toasts the outside and liquefies the inside. On my plate, I didn't like eating the toasted peeps straight up but I loved mixing them in with the sweet potatoes -- the peeps fluff up the potatoes while adding a hint of sweetness.

These are good; so good. Make them very, very soon.

Patate Douce Casserole Avec Peeps

8 medium sweet potatoes
6 Tbs. unsalted butter, melted
3/4 c. brown sugar
1 tsp salt
1 tsp cinnamon
1/4 tsp nutmeg
1/4 tsp ginger
Peeps (about 20)

Preheat oven to 350-degrees. Wash the outside of the sweet potatoes and pierce all over with a fork. Place on a lined (foil or parchment) baking sheet and bake for 1-1/2 to 2 hours until soft and the potatoes' natural sugars bubble out of the fork-made holes. Allow potatoes to cool to room temperature (or pop them in the fridge and deal with them when you are ready).

Preheat the oven to 400-degrees. Scoop out the sweet potatoes' flesh into the bowl of a stand mixer and beat until desired consistency is reached (I like mine relatively smooth but dotted with sweet potato bits). Add melted butter, brown sugar, spices and salt; mix until well combined. Scoop mixture into a 9-inch pie plate and bake 30 to 40 minutes or until the center is hot. Arrange peeps around edge and bake 5 more minutes.


*As I don't know how to speak French, if the title for this recipe is completely nonsensical, please suggest a correction.

BBQ Chicken Casserole

This recipe comes from the back of a package of Simply Potatoes Shredded Hash Browns. It’s listed on the site and yet, when you click on the link, it just takes you to an all-purpose recipe page. Very wonky.

I’m posting it here (slightly adapted) because it’s very easy to make and very tasty to eat. (It pairs well with Patate Douce Casserole Avec Peeps -- and now you know exactly what we had for dinner.)

The barbeque sauce is the primary seasoning here, so choose one you love. I left out the cilantro leaves because they’re what I imagine evil tastes like.

BBQ Chicken Casserole

1 pkg. Simply Potatoes Shredded Hash Browns (or 20 oz. potatoes, peeled and shredded)
1 medium onion, chopped
2 tsp. olive oil
1/2 tsp. salt
1/4 tsp. pepper
1 lb. chicken breasts, skinless and boneless
1-1/4 c. bbq sauce, or more to taste (Recommended: Sweet Baby Ray’s Honey barbecue sauce)
Fresh cilantro (optional)

Preheat oven to 400-degrees. In a medium bowl, combine hash browns, onion, oil, salt and pepper and mix well. Spread the mixture in the bottom of a 9x13-baking dish. Top with chicken breasts; spread bbq sauce evenly over chicken. Bake until chicken is no longer pink, about 45 minutes. Top with cilantro if desired, but why ruin a perfectly good meal?

Grade: A

Sunday, April 02, 2006

Magnolia Bakery's Famous Banana Pudding

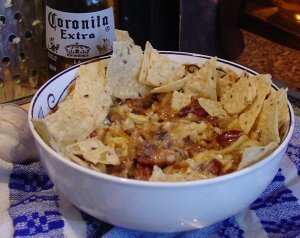
My attempt at food styling & photography.


I love potlucks, if for no other reason than they give me an excuse to try out recipes. (The massive quantities of food don't hurt either. Of course, for every well-made Italian Wedding Soup, there's a hot dog helper being forced down unsuspecting throats. )

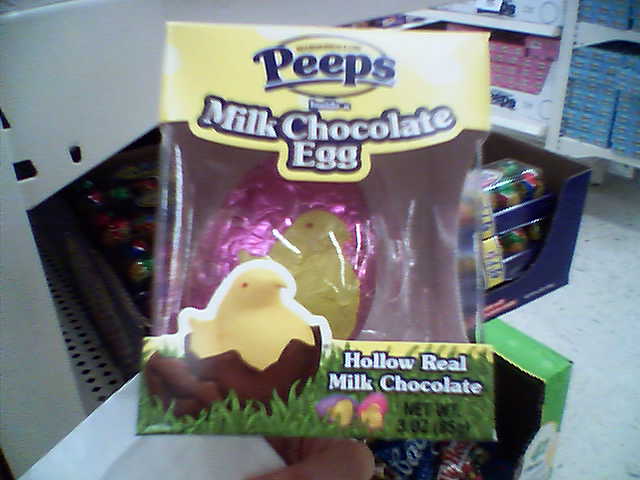
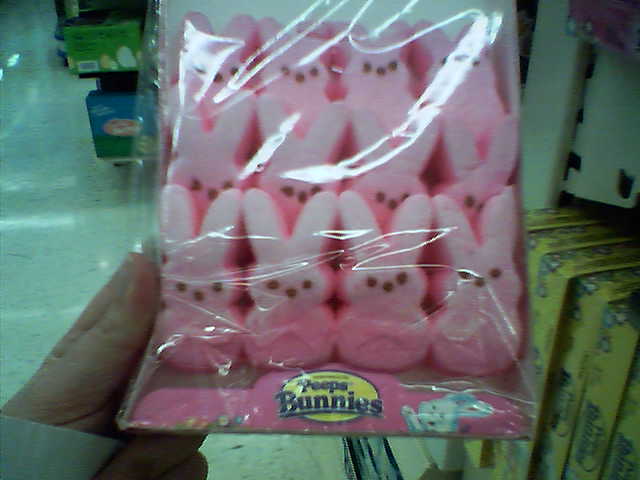
For today's lunch, we brought Shane's "Viva Lula Brazilian-style Black Bean Soup" (post TK), the Peeps on the Lawn dessert salad, and the Magnolia Bakery's Famous Banana Pudding.

It's very easy pudding to make (especially since it uses instant pudding) though there are time constraints. The condensed milk-water-instant pudding base has to be chilled for a minimum of 4 hours. Once you add the whipped cream and assemble, the recipe specifies chilling everything again for at least 4 -- but no more than 8 -- hours.

Who has that time? I made the base yesterday afternoon (it firmed up quickly, but I left it in the fridge for 4 hours anyway), assembled everything last night, and placed back in the refrigerator. It was eaten around 11:15am today so, all told, it sat in my fridge, fully assembled, for 13 hours.

It was fine. More than fine: really good. And now, 24 hours after it was first assembled, it's really, really good.

I'd never whipped heavy cream before so I was a bit wary; go too far and you'll get butter. I used the balloon whisk on my Kitchen Aid mixer, cranked it to 10 and, before I knew it, I had whipped cream. Surprisingly easy -- and now I'm eager to do it again, flavoring the cream with vanilla, mint, orange, coffee, amaretto, rum ... the list goes on and on.

As for the pudding, it had a gentle banana flavor when served this morning, though I'm sure if I had used riper bananas, the flavor would have intensified. (Having said that, the bananas I used were fully yellow with spots. Anything less ripe would have been a bad idea.) Now (again, 24 hours later) the flavor is spot on. Yum.

This pudding doesn't have the heavy mouth feel typical of pudding; the whipped cream really lightens the consistency, though remains rich and filling. It's much more a banana cream than a pudding. In fact, it might be nice to serve the pudding as a pie by placing it in a Nilla crumb crust (or graham cracker crust , or chocolate cookie crust) and topping it with dollops of sweetened whipped cream, some banana slices and a few cookies. (Hmm, you might even echo bananas foster by using a cinnamon graham cracker crust and topping the pie with rum flavored whipped cream...)

I pulled this recipe from The Recipe Link , which has an extensive list of sample cookbook recipes. The pudding recipe appears here as it does on Recipe Link.


Magnolia's Famous Banana Pudding

1 (14-ounce) can sweetened condensed milk
1 1/2 cups ice cold water
1 (3.4-ounce) package instant vanilla pudding mix (preferably Jell-O brand)
3 cups heavy cream
1 (12-ounce) box Nabisco Nilla Wafers (no substitutions!)
4 cups sliced ripe bananas [Use the kitchen measurement convertor -- LR]

In a small bowl, on the medium speed of an electric mixer, beat together the sweetened condensed milk and water until well combined, about 1 minute. Add the pudding mix and beat well, about 2 minutes more. Cover and refrigerate for 3-4 hours or overnight, before continuing. It is very important to allow the proper amount of time for the pudding mixture to set.

In a large bowl, on the medium speed of an electric mixer, whip the heavy cream until stiff peaks form. Gently fold the pudding mixture into the whipped cream until well blended and no streaks of pudding remain.

To assemble the dessert, select a large, wide bowl (preferably glass) with a 4-5-quart capacity. Arrange one-third of the wafers to cover the bottom of the bowl, overlapping if necessary, then one-third of the bananas and one-third of the pudding. Repeat the layering twice more, garnishing with additional wafers or wafer crumbs on the top layer of the pudding. Cover tightly with plastic wrap and allow to chill in the refrigerator for 4 hours - or up to 8 hours, but no longer! - before serving.

Saturday, April 01, 2006

A Food Tour In Camera-Phone-O-Vision

Yesterday, I picked up the red Peeps exclusive to Target. While there, I took some photos before making my way to Kmart. (I went to Pier 1 as well but there was very little food to photograph.)

Resting comfortably at home.


At Target: the Peeps shrine.


Plush Peeps: now you can play with them without using the microwave.


Smores Peeps kit containing Peeps, Nestle chocolate (???) and graham crackers.

Chocolate crosses. "They're just like Jesus died on! Yummy!"

At KMart: the Peeps ring pop. I'm kicking myself for not buying this. This one was stawberry cream flavored; the other, marshmallow.


I love these; destructable candy is a great idea. The Easter Bunny brought one of these to Sadie last year; perhaps she will do that again.


Bunny peeps suffering from vitiligo .

-FIN-


Peeps on the Lawn Dessert Salad

A petite Peeps serving.

A plethora of Peeps.

WARNING: If you don't like your sweets super-sweet and neon-colored, don't make this. Instead, have some melba toast and a cup of sugarless tea while looking at some other recipes.

Doug over at Cooking With Peeps suggested his Peeps on the Lawn dessert salad to use up the many, many peeps I've bought (90). He describes the dish as "a Snickers Salad with some Peeps on top."

Excited, yet troubled by a dessert that combines instant pudding, Cool Whip, Snickers, and apples, I did a Google search for Snickers Salad. Apparently, it's very popular and a must for many families' holiday dinners.

Gordon at Everything2 explains:


This dish is a family tradition in my wife's family. I first ran into (away from) it the first time they shared Easter dinner with me. Not being a fan of potato salad (or most creamy salads and side dishes, for that matter), I was hesitant to sample the small dollop that was occupying space on my plate that I thought would have been better suited to ham. Or mashed potatoes. Or more ham. By the time I worked up the courage to try some, and thus realize that it did happy things to my mouth, I was too stuffed to consider eating more. And although I know it tastes wonderful, its appearance and the concept of drowning chocolate bars in pudding and Cool Whip befuddles me.


I found that reassuring.

It is good, in a kitschy Lutheran* pot-luck-dinner-dish sort of way. I liked it, though my husband thought it was so awful ("Bleggh! Are you trying to kill me?" ), he washed it down with a glass of scotch. (Really, any excuse to drink his paint-thinner Laphroaig). To each his own.

Peeps on the Lawn is extremely easy to make; all you have to know is how to chop and mix.

Peeps on the Lawn dessert Salad (adapted; see the original here)

1 3.4 oz package instant French Vanilla Jello Pudding Mix
1 cup milk
1 12-oz container Cool Whip
2 tsp. vanilla extract (optional, but recommended)
Green food coloring
1 pkg. Snickers minis , chilled and diced
5 Granny Smith apples
Small chocolate pastel candies
Peeps

In a large bowl, mix pudding together with milk until combined; fold in Cool Whip and vanilla. Tint green with food coloring. Fold in chilled Snickers bars.

Just before serving, peel, core, and dice apples; fold into pudding mixture.Transfer mixture into serving bowl. Decorate top with Peeps and pastel candy. Enjoy festive Springtime dessert.

Many thanks to Doug and Gordon for their help!

Update: I served this in a large glass bowl today at an Episcopal Church luncheon -- it was well received. Shane thinks that next time, I should cut the peeps in half and line the bowl with them. That would go over big.


*Yes, I know what those Lutheran dinners are like. I was raised Lutheran.

Tags:
, , , , , , , , , ,

Guest Recipe: Shane-boy’s Texas Bane 'n' Beef Chili Recipe


A Note From Your Webhost:

Even though my husband, Shane, was an air force brat, he identifies Texas as his home. He was born there and, before moving to Upstate NY, spent the longest part of his life there. His parents live in San Antonio as does his brother and sister-in-law.

I am from New York: born in Manhattan, raised on Long Island, educated in Manhattan, now living in Upstate NY.

I say all of this because while this is great chili -- fabulous chili -- the southern-isms in this recipe irritate the hell out of me. But Shane would only let me publish this with the Dukes of Hazard phrasing left in. (Stupid good ol' boy.)

I'd recommend letting the flavors meld in the fridge for 24 hours before eating. Simply reheat in the microwave. -- Laura Rebecca


Shane-boy's Texas Bane 'n' Beef Chili Recipe

"This recipe makes a lot of damn chili!" - unknown

"Ingraydients"

45 oz kidney beans, drained
45 oz black beans, drained
30 oz peeled whole tomatoes, cut in quarters, drained
12 oz tomato paste
12 oz diced tomatoes
2 lbs ground beef
2 Spanish onions, sliced into big chunks
1 Zucchini, chunked
24 oz mushrooms, sliced
12 oz pickled 'n' sliced jalapenos
4.5 oz minced garlic
8 tbsp olive oil
6 tbsp cumin
6 tbsp chili powder
6 tbsp garlic salt
6 tbsp salt
6 tbsp honey
3 tbsp oregano
3 tbsp pepper
1 tbsp cayenne pepper
1 tbsp habenero hot sauce
1 cup beer (Corona is best)

"Instrucshuns"

Drain ingredients to keep the final product from getting all watery; the black beans will break down and liquefy after being cooked for a while. Put tomatoes into big pot along with beans and tomato paste and beer, over medium-high heat, bring to boil, stirring all along.

Brown meat and 4 oz garlic in large skillet with 4 tbsp oil and spices (high heat), about 12 minutes. Drain meat juice into a saucepan and put the mushrooms in there on high heat, cook for about 10 minutes until nice and soft. Dump meat into the pot and stir.

Cook onions and zucchini and 4 oz garlic in large skillet with 4 tbsp oil until translucent and caramelized, with spices (high heat), about 6 minutes. Dump veggies into pot and stir. Dump jalapenos into pot and stir. Add remaining spices, and hot sauce to taste. Cook till it gets all gooey (about 40 minutes) and then it's ready to serve!

"Fixins"
Sour cream
Corn Bread
Coleslaw
Tortilla Chips
Cheddar & Monterrey Jack Cheeses
Dr Pepper, to drink

Grade: Immediately after cooking, B-; After 24 hours, A+