Showing posts with label Cookies. Show all posts

Monday, February 15, 2010

Chewy Chocolate Drop Cookies


Well, Happy New Year, everybody! Sure, it's only a month and a half late, and three and a half months since my last blog post, but who's counting?

Where have I been? I started a new job about six months ago (has it been that long? Holy crap.) in which I am mistress of all things web ("strategic messaging and brand conformity" to be specific). The initial focus of my job was make sure a new website was launched and ensure over 30,000 web pages were converted to the new look. If not readily apparent, this is a HUGE task but, fortunately, I am not alone - there is a special-ops CIT team bringing their time, talent and patience in dealing with me to get the mission accomplished.

I have promised two members of the team (coincidentally named "Laura" and "Laurie") that if their portion of the job is finished by April, they receive a cake of their choosing. (I think I floated the opera cake at one point, which illustrates just how desperate I was/am to finish this project.) "The Lauras," as we are sometimes collectively referred, accepted and now we are eyeing one another carefully, hungry for what the other has promised. (I'm not sure if the other members of the CIT team are aware of this deal but if they find out, I will happily enter a similar bargain with them.)

In any event, all of this web work -- staring at web pages, reorganizing architecture, planning URLs, discovering bugs, tweeting, facebooking, etc. etc. -- has driven me from updating this blog. Because at the end of the day, the last thing I want to do use a rich text editor to upload another g.d. picture to the Internet.

Cooking has fallen to the wayside too. We have eaten many quick-fix meals over the past several months, things that take 20 minutes, max, to make.

But, I love cooking. And blogging has always been pretty great, too -- particularly the interaction between readers and other bloggers.

So, I think I'm back. It won't be exactly like before: though I've always had an emphasis on simple recipes with delicious results, I'll likely be looking for recipes that are that much simpler -- but I'm not wandering into Sandra Lee territory, either.

The other shift will be a greater emphasis on vegetarian cooking. Shane has decided to become a fish-etarian, meaning he's avoiding all meat except seafood. That's been another challenge for me, as I've always viewed a good Sunday dinner being centered around a roast chicken, meat lasagna, or pork tenderloin. So, we'll see what happens there.

As always, if you have recipe ideas, suggestions or questions, send them my way via LauraRebeccasKitchen@gmail.com . And if you've read this far, you deserve a cookie; here's a recipe. :)


Chewy Chocolate Drop Cookies
(adapted from Laura's Best Recipes)

2 cups + 2 tbsp all-purpose flour
1/2 tsp baking soda
1/2 teaspoon salt
1 1/2 sticks of unsalted, melted butter -- cooled
1 1/2 cups packed golden brown sugar
1 large egg
1 large egg yolk
2 tsp vanilla extract
1 cup chocolate drops (like M&Ms)

Place oven rack in the middle of the oven. Preheat oven to 325.

In a microwave-safe bowl, melt the butter in the microwave, then set aside and allow to cool.

Line a baking sheet with parchment paper.

Combine flour, baking soda and salt in a bowl.

In a large mixing bowl, beat the melted (and cooled) butter and sugars together with a mixer on medium speed for about 2 minutes. Beat in the egg, yolk and vanilla and beat until the blend starts to lighten in color and looks like it's beginning to whip; scrape down the sides of the bowl as needed.

Place mixer on the lowest speed and very slowly add the flour mixture a little bit at a time. Don't over mix; mix until the flour is just blended into the wet ingredients. Add the chocolate drops and stir with a spoon until well-incorporated. (Beating the chocolate into the dough with the mixer will break the chocolate drops.)

Chill the dough in the refrigerator for 10 minutes.

Take approximately 2 tablespoons of dough at a time and roll the dough into well-formed balls. For flatter cookies, flatten the dough gently; for puffier cookies, leave the dough in balls. Place the dough on the baking sheets about 2 inches apart. Bake the cookies for 6 minutes, rotate the cookie sheet, and bake another 7- 10 minutes. The cookies' edges should just barely begin to brown. The center will look puffy and/or slightly set.

Remove the baking sheet and let the cookies cool for 10 minutes. Transfer to a wire rack to allow the cookies to completely cool. Store in an air-tight container.

Saturday, September 05, 2009

Coconut Macaroons and Confections of a Master Baker


A few weeks ago, Stephanie to participate in The Edible Word for Confections of a (Closet) Master Baker by Gesine Bullock-Prado.

The rules were to "pick a dish that she mentions in the book or an ingredient that she talks about. Find a recipe or create a recipe for that dish, pastry or ingredient, and make it! (or if you like, make one of the yummy recipes she's included in the book)

Post an entry with a picture to your blog and share with us what compelled you to pick that particular dish, and any history about the recipe you created or are using to make that dish."

Bullock-Prado's book is a fun read -- though the publishing company organized some of the recipes and chapters a bit oddly and I am bothered by the author's attitude toward people who aren't thin.

Bullock-Prado is known for her french-style, almond macaroons. It's a recipe and cookie near and dear to her heart, which she writes at length about. Unfortunately, it's so near and dear that she doesn't share her recipe with her readers.

Still all this talk about macaroons had me craving *coconut* macaroons and, fortunately, Bullock-Prado provides a nice recipe for these on her blog.

They come together quickly and easily -- and the result is absolutely delicious. I didn't dip these in melted dark chocolate, but that would be a nice touch!


Coconut Macaroons (adapted)

4 egg whites
3 ½ cups sweetened shredded coconut
¾ cup sugar
1 tsp. vanilla
½ tsp. salt

Preheat oven to 300-degrees F. Line two baking sheets with parchment paper; set aside.

Combine all ingredients into a metal/heatproof bowl and set the bowl on a saucepan of simmering water. Stir occasionally to prevent the bottom from burning.

When the mixture is hot and has thickened slightly (about 10 minutes), use a medium sized cookie scoop, to scoop and drop batter onto the prepared baking sheet. Bake for 15 to 20 minutes, or until the edges are dark golden brown, rotating the pans from front to back and top to bottom half-way through the baking time.

Saturday, July 04, 2009

Happy Independence Day!

Wishing you, your friends and your family a festive and fun-filled 4th of July!

Glazed Sugar Cookies


For the cookies:
3/4 cups butter, softened
1 cups white sugar
2 eggs
2.5 cups all-purpose flour
1 teaspoons baking powder
1/2 teaspoon salt

In a large bowl, cream butter and sugar together until smooth. Beat in eggs and vanilla. Stir in the flour, baking powder, and salt. Cover, and chill dough for at least one hour (or overnight).

Preheat oven to 400-degrees F. Roll out dough on floured surface 1/4 to 1/2 inch thick. Cut into shapes and place cookies 1 inch apart on a parchment-lined cookie sheets.
Bake 6 to 8 minutes until light golden brown. Cool completely before glazing.
Yields about 30, 2-inch cookies

Glaze

1 cup confectioners' sugar
1 Tbsp. light corn syrup
2 Tbsp. water or milk
food coloring, if desired (I used gel food coloring)
1 tsp. extract (almond, orange, etc.; vanilla extract will turn white icing tan)

Stir confectioners' sugar, corn syrup, and water together. Stir in food coloring if desired. Stir glaze before each use to ensure a uniform color.

Tuesday, February 17, 2009

Heart Shaped Samoas


Do you follow Nic's Baking Bites ? It's filled with lots of tempting sweets and a week doesn't go by without a post that makes me drool.

Nic is especially good at recreating beloved recipes, especially Girl Scout cookies. She's got Thin Mints, Homemade Do-Si-Dos , Homemade Tagalongs and, Shane's favorite, Samoas.

So for Valentine's Day, I decided to follow Nic's Samoa recipe, but make the traditionally round cookies into hearts.

The verdict? YUM! With chewy caramel, toasted coconut, a buttery shortbread base, all kissed by dark chocolate, how could you go wrong? I'd say it was a spot-on recreation but this is so much better than the original. Those Girl Scouts better watch their backs...

The trickiest part of the recipe was spreading the coconut caramel topping onto the shortbread cookie base. The topping is awfully sticky and wanted to cling to almost everything it touched -- except the cookie. Eventually, I just used a spoon to spread the topping onto the cookie and, as the caramel & coconut cooled, I pressed it more firmly onto the cookie and shaped it into hearts.

Nic recommended Werther's Chewy Caramels but I was unable to find them at the store (what's up with that, Wegmans?!?) so I picked up Brach's Milk Maids instead. The end result was very tasty, but the caramel & coconut was a bit chewier than I would have liked; a softer caramel (but NOT a flowing one) would have been better.

I left the half the heart-shaped shortbread cut outs free of the coconut caramel, leaving some simply plain (for Kian's valentine gift), and others drizzeled in chocolate (for Sadie).

The unused caramel coconut topping didn't go to waste, however; it was pressed into a rectangle about 1/4-inch thick, allowed to cool, and then cut into bite sized pieces. Voila! Tasty caramel coconut chews.


Homemade Samoas from Nic's Baking Bites (slightly adapted)

Cookies
1 cup butter, soft
1/2 cup sugar
2 cups flour
1/4 tsp baking powder
1/2 tsp salt
1/2 tsp vanilla extract
up to 2 Tbsp milk

Preheat oven to 350-degrees.

In a large mixing bowl, cream together butter and sugar. Mix in flour, baking powder and salt at a low speed, followed by the vanilla and milk, adding in the milk as needed to make the dough come together without being sticky (it’s possible you might not need to add milk at all). The dough should come together into a soft, not-too-sticky ball. Add in a bit of extra flour if your dough is very sticky.

Working in two or three batches, roll out the dough between pieces of wax or parchement paper to about 1/4-inch thickness (or slightly less) and cut out shapes using a 1 to 1 1/2 -inch cookie cutter.

Place on a parchment lined baking sheet. If you'd like to make your rounds look just like samoas, use the end of a wide straw to cut a smaller center hole.

Bake cookies for 10-12 minutes, rotating the pans halfway through, until bottoms are lightly browned and cookies are set.

Cool for a few minutes on the baking sheet then transfer to a wire rack to cool completely.

Coconut Caramel Topping
3 cups shredded coconut (sweetened or unsweetened)
12-oz good-quality chewy caramels
1/4 tsp salt
3 tbsp milk
1/2 tsp vanilla (optional)
8 oz. semisweet chocolate (chocolate chips are ok)

Preheat oven to 300 degrees. Spread coconut evenly on a parchment-lined baking sheet (preferably one with sides) and toast 20 minutes, stirring every 5 minutes, until coconut is golden. Cool on baking sheet, stirring occasionally. Set aside.

Meanwhile unwrap the caramels and place in a large microwave-safe bowl with salt, milk, and vanilla. Cook on high for 3-4 minutes, stopping to stir a few times to help the caramel melt. When smooth, fold in toasted coconut with a spatula.

Using a small spoon or small offset spatula, spread topping on cooled cookies, using about 2-3 tsp per cookie. Reheat caramel for a few seconds in the microwave if it gets too firm to work with.

While topping sets up, melt chocolate in a small bowl. Heat on high in the microwave in 45 second intervals, stirring thoroughly to prevent scorching. Dip the base of each cookie into the chocolate and place on a clean piece of parchment paper. Transfer all remaining chocolate (or melt a bit of additional chocolate, if necessary) into a piping bag or a ziplock bag with the corner snipped off and drizzle finished cookies with chocolate.

Let chocolate set completely before storing in an airtight container.

Yields 3 1/2 to 4 dozen cookies.

Friday, January 02, 2009

Lace Cookies (Now Gluten Free!)


I've written about these before but here I go again: these cookies are really so delicious that they're irresistible. Lace cookies (aka, Florentines) are crispy, wafer thin cookies with an amazing carmelized sugar and browned butter flavor that sandwich a thin layer of dark chocolate.

Jenny is throwing a party on Sunday and wanted a few goodies that can be eaten by everyone, including a few guests who can't have gluten. If you take a look at the original lace cookie recipe, you'll see there's a minimal amount of flour, making it easy (ridiculously easy) to adapt to gluten free.

We swapped out the flour for almond meal (left over from December's Daring Baker Challenge) and, to be on the safe side, used gluten free oats (meaning, they were not processed in a facility near wheat products). The result is virtually identical: the only differences I've noticed are a slightly nuttier flavor than the originals (duh) and the GF version seem to have stayed crisper longer.

But still friggin' delicious.


Lace Cookies
1-1/2 cups uncooked regular oatmeal
1-1/2 cups light brown sugar
2 Tbsp. almond meal
1/2 tsp. salt
2/3 cup melted butter
1 egg, lightly beaten
1/2 tsp. vanilla

Preheat oven to 350-degrees and line baking sheets with parchment paper. Mix the oatmeal, sugar, flour, and salt in a bowl. Stir in the melted butter, then add the egg and vanilla and mix well. Arrange the batter by half-teaspoonfuls on the sheet, about 2 inches apart on the baking sheets. Bake until lightly browned, about 5 minutes. Cool slightly and remove the cookies with a spatula as soon as they are firm. (If they become to hard, pop them back in the oven for a moment to soften –- but my kitchen if icy and I've never run into this problem, so you probably won’t have to worry about it.) Yields about 60 cookies. Once the cookies cool, place them gently in an airtight container or continue to the next step.

Chocolate Filling
1 bag of dark chocolate chips (I used Ghirardelli's 60% cocoa)

Place chips into a microwave-safe, plastic zip-top bag. Microwave for approximately 1 minute on 40-percent power, and “smush” the chocolate with your hands. Continue microwaving the chocolate for 30 second intervals at 30-percent power until melted, smushing between turns.

Once your chocolate has melted, snip a small corner off the bag to create a homemade pastry bag. Place a small dollop of chocolate in the center of a lace cookie (flat side up) and delicately top with another cookie (flat side down against the chocolate). Press the cookies together gently so the chocolate spreads evenly. Rest to dry on a cooling rack.

If you have leftover chocolate after filling the cookies (you probably will) squeeze the chocolate into another zip-top bag. Line your cookies up on your cooling rack, placing paper beneath the rack to catch extra chocolate. Make a tiny snip in the zip-top bag’s corner so that when squeezed, you’ll get a thin ribbon of chocolate. Working quickly, squeeze the chocolate over the cookies on a diagonal from left to right. Your cookies should have little chocolate stripes. Repeat the technique, this time moving from right to left. Now your cookies should have a diamond pattern on them. Don’t worry about being perfect; they’ll look beautiful. (If you’re feeling ambitious, melt white chocolate and drizzle on the cookies for a nice contrast.) Once dry, store in an airtight container.

Wednesday, December 24, 2008

Eggnog Cookies


Over at Culinary in the Desert, Joe posted his recipe for Eggnog Spiced Spritz Cookies as part of his holiday baking spree.

"Mmmm," I thought. "Those sound like the ones my mom makes."

So I went off in search of my cookie press. And came up empty.

I can't remember the last time I used it but I'm sure it's in our house somewhere -- probably in one of those boxes that remain unpacked from our move over two years ago.

But still, the craving for buttery, noggy cookies called, so I made Joe's recipe and shaped them into rounds.

The result is a bit softer than I'm sure the spritz cookies would be, but they remain wonderful. I added a bit more rum and vanilla extracts to the glaze because I love when those flavors pop, but you should play with the flavorings as you see fit. My changes are reflected in the recipe below.


Eggnog Cookies
(adapted)

2 1/4 cups all-purpose flour
3/4 tsp. nutmeg
3/4 tsp. salt
2 sticks (16 Tbsp.) unsalted butter, softened
2/3 cup sugar
1 large egg
1 1/2 tsp. rum extract
1 tsp. vanilla

Preheat oven to 400 degrees and line baking sheets with parchment paper.

In a medium bowl, whisk together flour, nutmeg and salt.

In a large mixing bowl, beat together butter and sugar until smooth and creamy. Mix in egg, rum extract and vanilla until combined, scraping down the bowl as needed. Add dry ingredients and mix just until combined.

Scoop a heaping tablespoon of dough with a spoon, roll it into a ball, and flatten it to about 1/4-inch thickness before placing on the baking sheet. Cookies should be spaced about 2 inches apart.Press dough into cookie press with desired shaped-plate. Bake until the edges are golden, about 8 to 12 minutes. Remove and let cool on the baking sheets for about 1 minute before transferring them to a wire rack to glaze (recipe follows). Yields approximately 3 dozen.

Glaze
1 cup confectioners' sugar
4 Tbsp. butter, melted
1 to 2 Tbsp. warm water
1/4 to 1/2 tsp. rum extract
a splash of vanilla extract
colored sugars or candies, if desired

In a small bowl, still together confectioners' sugar, melted butter and enough warm water for desired consistency. Stir in rum and vanilla extracts. Glaze by dipping the tops into the mixture or brushing it over the warm cookies. Sprinkle with sugars or candies before the glaze sets.

Tuesday, December 23, 2008

Orange Cardamom Cookies

Do you like my Truman Capote snowman?


Looking for a tasty alternative to sugar cookies? Give these lovely cookies a try. I love their warm orangey flavor; it's such a nice, spiced departure from the traditional cut-out cookie.

You don't have to frost them, but the citrus icing really pulls everything together.

Orange Cardamom Cookies
(source)

2 1/2 cups all-purpose flour
1 1/2 tablespoons grated orange zest
1 1/2 teaspoons ground cardamom
1 teaspoon salt
2 sticks (1/2 pound) unsalted butter, softened
3/4 cup sugar
1 large egg yolk
2 tablespoons heavy cream


Garnish: citrus icing (below)

For dough:

Whisk together flour, zest, cardamom, and salt.

Beat butter and sugar with an electric mixer until pale and fluffy, then beat in yolk and cream. At low speed, mix in flour mixture in 3 batches just until a dough forms. Quarter dough and form each piece into a 6-inch disk, then chill, wrapped separately in plastic wrap, until firm, 2 to 3 hours.

Preheat oven to 350°F with rack in middle. Roll out 1 piece of dough between sheets of parchment paper into an 11-inch round (1/8 inch thick). Slide dough in parchment onto a tray and chill until firm, about 15 minutes.

Cut out as many cookies as possible with cookie cutter (chill dough again if necessary), reserving and chilling scraps. Transfer cookies to a parchment-lined large baking sheet, arranging them 1 inch apart.

Bake until edges are golden-brown, 9 to 12 minutes. Cool on baking sheet 5 minutes, then slide cookies, still on parchment, onto a rack to cool completely.

Make more cookies with remaining dough and scraps (reroll only once) on cooled freshly lined baking sheets. If desired, ice when cookies are completely cool.


Citrus Icing

1/2 cup fresh orange juice, strained
1 teaspoon fresh lemon juice, strained
1 (1-pound) box confectioners sugar
4 teaspoons powdered egg whites (not reconstituted) such as Just Whites

Beat together all ingredients in a large bowl with an electric mixer at medium speed until just combined, about 1 minute.

At high speed, continue to beat until icing is thick and holds soft peaks, about 3 minutes in a stand mixer or 10 with a handheld. If not using immediately, cover surface with a dampened paper towel, then cover bowl tightly with plastic wrap.

Cooks' note: Icing can be made 1 day ahead and chilled, its surface covered with a dampened paper towel and bowl covered tightly with plastic wrap.

If coloring icing, transfer small batches to small bowls, 1 for each color, and tint with food coloring. Spoon each color of icing into separate sealable bags, pressing out excess air, and snip an 1/8-inch opening in 1 bottom corner of each bag. Pipe icing onto a plate to test consistency. If too thick, thin a small batch with a few drops of orange juice.

Decoratively pipe icing onto cookies, then sprinkle with decorative sugar (if using) and let dry completely, about 1 hour (depending on humidity).

Monday, December 22, 2008

Honey Mound Cookies


Another recipe from blog favorite, Mark Pescatore:

This is an OLD recipe, one my family has been since before I was born, a gem from a cookbook from yesteryear. Understand that this is a cookie that tastes better a day after you make it. When you pop one in your mouth fresh out of the oven, you'll probably think it's not without its charm, but nothing particularly special. The next day you'll try one and curse yourself for not making a double batch. For best results, use an AirBake cookie sheet (it does make a difference).

Honey Mounds


1/3 cup butter or margarine, softened
1/3 cup sugar
1 egg
2/3 cup honey
1 tsp. vanilla extract
2 1/3 cups sifted flour
1 tsp. soda
1/2 tsp. salt
red and green colored sugar

Preheat oven to 350 degrees F and line baking sheets with parchment paper. In the bowl of a stand mixer, cream together butter, sugar, egg, and honey. Add vanilla and mix. Add sifted flour, soda and salt; mix well. Cover bowl with plastic wrap and chill at least an hour (or the dough will be sticky and difficult to work with). Roll dough into 1-inch balls, then roll in colored sugar. Bake 10 to 12 minutes.

Yield: approx. 3 dozen

Monday, December 15, 2008

Wookie's Snickerdoodles


When I asked the kids last week what kind of cookie they'd want for Christmas if they could have only one kind, Sadie said, "Lace cookies." Kian said, "Snickerdoodles."

My goal was to find out what cookies they really, really loved, so that we could all make, and enjoy, those cookies together. Lace cookies are wonderful, but they're labor intensive (thus making the recipe less than kid-friendly) and feature chocolate (which Kian doesn't like). Fortunately, Sadie was more than happy to work on snickerdoodles -- especially after I told her that there would be lace cookies in the house for Christmas.

The snickerdoodle recipe I used came from Serious Eats, where commenter Donnie was looking to replace the recipe he'd lost. "It was special," Donnie writes, "because there is NO shortening, and not an over abundance of flour."

Commenter Wookie came to the rescue and her recipe, with a few changes, appears below. (I might add a little bit of nutmeg to the dough next time, just to play.)

It's a very nice cookie: buttery, not too sweet, with a lovely cinnamon flavor. We made them Friday night -- three dozen -- and by Sunday morning, they were all gone: the hallmark of a good cookie recipe.

I think we're going to make some more right now...


Wookie's Snickerdoodles (Source)

2 sticks of butter, softened
1 1/2 cups sugar, plus 3 Tbsp, separated
2 eggs
2 tsp vanilla extract
2 3/4 cups all purpose flour
2 tsp cream of tartar
1/4 tsp salt
1 tsp baking soda
3 Tbsp cinnamon

Preheat oven to 375-degrees. In the bowl of a stand mixer, cream butter and 1 1/2 cups sugar until light and fluffy. Add vanilla and eggs. Beat until well mixed.

In a large bowl, mix together dry ingredients and add to the butter and egg mixture. Mix on a low setting, just until the dough comes together.

In small bowl, stir together the cinnamon and the 3 Tablespoons of sugar.

Using a small cookie scoop, roll a tablespoon of dough into a ball, and then roll in the cinnamon sugar until fully coated. Place on an ungreased sheet pan, about an inch apart, and flatten gently with the back of a spoon. Bake for 8-10 minutes and cool on a cookie rack.

Yields approximately 3 dozen.

Friday, August 08, 2008

Chocolate Dipped Butter Cookies


For my mom's birthday (which is today) I offered to bake her anything she liked. Always a butter cookie lover, she requested:

A butter cookie that is partially dipped in chocolate. You know, like the old fashioned delicious cookies that bakeries used to make themselves before they bought them wholesale from large commercial bakeries made with butter flavoring.
Can you tell our family is into quality food?

The recipe for the cookies appears below; as for the chocolate, I melted and tempered Ghirardelli semi-sweet chocolate, getting a refresher in the method from Cooking for Engineers. After tempering, I dipped each cookie halfway, ran a fork gently through the liquid chocolate to provide visual interest, and set the cookie on a parchment-lined baking sheet to set up.

I hope these cookies do her request -- and she herself -- justice. Happy Birthday, Mom.

Chocolate Dipped Butter Cookies (adapted)

2 cups all-purpose flour
1/2 teaspoon salt, plus a bit more for sprinkling
1/4 teaspoon baking powder
2 sticks (1 cup) unsalted butter, softened
1 cup sugar
1 large egg
1 teaspoon vanilla

Sift flour, salt, and baking powder together in a medium bowl.

In a large bowl with an electric mixer, beat butter until creamy. Gradually add sugar, beating until light and fluffy. Add egg and vanilla and beat until well combined. Gradually add flour mixture, beating just until mixture forms a dough.

Divide dough between 2 large sheets of parchment or wax paper and form each half into a 10- x 1 1/2-inch log, wrapping it in the paper, and sealing the wrapped logs in a zip top plastic bag. Chill until firm, at least 4 hours and up to 5 days. (Or, dough may be frozen up to 2 months.)

Let dough soften slightly before cutting (or, if frozen, thaw). Preheat oven to 375-degrees F and line a baking sheet with parchment paper.

Slice dough into 1/4-inch-thick slices and place about 1 inch apart on baking sheet. VERY LIGHTLY sprinkle the tops of cookies with a bit of sea salt. To quote PJ Hamel, who used the technique on chocolate chip cookies, "We’re not talking pouring salt on your popcorn here. Just a minimalist’s sprinkle is what you’re after."

Bake cookies in batches in middle of oven until golden around edges, 10 to 12 minutes. Transfer to a rack to cool completely before dipping in chocolate. Store cookies in an airtight container at cool room temperature for up to 5 days.

Yields about 50 cookies.

Monday, May 12, 2008

Jacques Torres' Chocolate Chip Cookies

There are so many different types of chocolate chip cookies -- flat and crisp, puffy and cakey, the kinds you find in Italian bakeries, the kinds you get in cafeterias, the kinds you eat in your Mom's kitchen.

This is a cookie you might find in a coffee house, or more likely, Jacques Torres' retail shop.

What drew me to Torres' recipe was the unusual blend of flour in the recipe; it combines pastry and bread flour, resulting in a nicely chewy cookie. Additionally, the cookie has a good deal of butter, is slightly salty, and of course, is studded with quality chocolate chips.

It is a cookie that will have you going back to the cookie jar over and over again.

For a really impressive presentation, use a 1/4-cup measuring cup to scoop out the dough and press it into 1/4-inch thick disks. You can fit four of these on a standard baking sheet.

Jacqures Torres' Chocolate Chip Cookies (via MarthaStewart.com, slightly adapted)

1 pound unsalted butter
1 3/4 cups granulated sugar
2 1/4 cups packed light-brown sugar
4 large eggs
3 cups plus 2 tablespoons pastry flour
3 cups bread flour
1 tablespoon salt
2 teaspoons baking powder
2 teaspoons baking soda
1 tablespoon pure vanilla extract
2 pounds 60-percent cocoa chocolate or other best-quality semisweet or bittersweet chocolate, coarsely chopped

Preheat oven to 350-degrees F; line baking sheets with parchment paper and set aside.

In the bowl of an electric mixer fitted with the paddle attachment, cream together butter and sugars. Add eggs, one at a time, mixing well after each addition. Reduce speed to low and add both flours, baking powder, baking soda and vanilla; mix until well combined. Fold in chocolate, making sure to distribute well.

Using a 4-ounce scoop for larger cookies or a 1-ounce scoop for smaller cookies, scoop cookie dough onto prepared baking sheets, about 2 inches apart. Bake until lightly browned, but still soft, about 20 minutes for larger cookies and about 15 minutes for smaller cookies. Cool slightly on baking sheets before transferring to a wire rack to cool completely.

Yields 26, 5-inch cookies or 100, 1 1/4-inch cookies.

Tuesday, April 29, 2008

PB Cinnamon Raisin Oatmeal Cookies


Several months ago, I fell in love with Peanut Butter & Co.'s Cinnamon Raisin Swirl. I can't fully explain it, but the combination of warm cinnamon, sweet raisins and savory peanut butter drove my taste buds delirious with happiness. For many a breakfast, I'd spread some on a slice of toasted wheat bread, drizzle it with a bit of local honey, and munch away.

When I came back from London, I brought back a few tins of Harrods biscuits, among them the Honey & Oat variety. One afternoon around 3pm (my daily sugar craving time) I went into the kitchen, opened the cupboard and saw the Harrods biscuits sitting next to the Cinnamon Raisin Swirl PB.

A match made in kitchen heaven. The peanut butter paired with the sweet oat biscuit beautifully. So beautifully that I knew I had to create a cookie that had it all.

I finally did. And they're delicious, either with a glass of cold milk or a cup of hot tea.

PB Cinnamon Raisin Oatmeal Cookies

8 Tbsp. (one stick) unsalted butter
1 cup packed light brown sugar
2 eggs
1 teaspoons vanilla
1 cup peanut butter
1 cup flour
1 cup old-fashioned oats
1/2 teaspoon baking soda
1 teaspoon cinnamon
2/3 cup raisins
1/4 teaspoon salt

Set oven rack to the middle position and preheat oven to 350-degrees F. Line three baking sheets with parchment paper; set aside.

In the bowl of a stand mixer, cream butter and brown sugar. Add eggs, vanilla and peanut butter and beat until combined, scraping down the sides of the bowl as necessary. Add dry ingredients EXCEPT raisins; blend. Fold in raisins by hand. Using a cookie dough scoop, form dough into tablespoon sized balls. Flatten dough balls to 1/4-inch thickness using the bottom of a drinking glass.

Bake for 10 to 12 minutes or until golden brown. Cool cookies on a cooling rack; store in an airtight container for up to one week.

Tuesday, March 04, 2008

Tate's Bake Shop Thin and Crisp Chocolate Chip Cookies

Chocolate chip cookies with their friend, Carmelized Pineapple Upside-down Cake.


I'm posting this before heading off to the gym, the first day of a renewed effort to lose the last 15 -- scratch that, 13.4 pounds -- to reach my goal weight. I'm kicking up my exercise regimen in the hopes that it speeds up the process so I'll be there before summer (though I'm conflicted about this & here's why) while maintaining my need to eat sweets.


Yes, it's a need, not a desire. I crave sweets everyday, usually multiple times, and it's a pull I can't ignore. Sometimes a stick of gum or a cup of tea will sate things, but often I need something more substantial.


Like a chocolate chip cookie. Studded with giant bits of dark chocolate, this crunchy little cookie is buttery with a salty hit; my favorite kind of chocolate chip cookie. Add a glass of milk, and I'm in heaven.


Tate's Bake Shop Thin & Crisp Chocolate Chip Cookies (source)


2 cups all-purpose pour
1 teaspoon baking soda
1 teaspoon salt
1 cup salted butter
3/4 cup sugar
3/4 cup firmly packed dark brown sugar
1 teaspoon water
1 teaspoon vanilla
2 large eggs
2 cups semisweet chocolate chips


Preheat the oven to 350-degrees F. Grease two cookie sheets or line them with parchment paper.

In a large bowl, stir together the flour, baking soda, and salt; set aside.

In another large bowl, cream the butter and sugars. Add the water and vanilla. Mix the ingredients until they are just combined. Add the eggs and mix them lightly. Stir in the flour mixture until just blended. Fold in the chocolate chips.


Drop the cookies 2 inches apart onto the prepared cookie sheets using two tablespoons . Bake for 12 to 17 minutes or until the edges and centers are golden brown. Remove the cookies to a wire rack to cool.


Yield: 4 1/2 dozen three-inch cookies.

Sunday, December 30, 2007

Guest Recipe: Lisa's Mayan Mystery Cookies

I used to date a man who loved the cocktail hour at wedding receptions; the combination of elegant mixed drinks with a panoply of carefully prepared finger foods proved too irresistible. Forget the cake, or the carefully plated fish-or-chicken entrees, the cocktail hour was where it's at.


After last night, I'm reminded why I agree.

Nancy hosted an end-of-the-year cocktail party last night, replete with lots of little nibbles: focaccia and olives, several wedges from the European cheese shop, shrimp cocktail, grilled mushrooms, pretzels and spicy mustard -- all delicious.

But my lust for sweets is never vanquished so, as soon as Lisa and Kip, two of Nancy's friends, showed up with a huge platter of cookies, I was on them like white on rice (the cookies, not the couple).

Heaped on the tray were scores of dark chocolate cookies, glittering with a light coating of sugar. They had the lovely, heady aroma of cocoa and cinnamon (a combination I love).
Taking a bite, I was rewarded with a tender cookie and a rich depth of flavor -- the chocolate and cinnamon, of course, but also little bursts of pure chocolate, followed by a gentle Cayenne heat. So delicious -- and a nice departure from the usual holiday-time cookie flavors.

I took a few home with me, but they're all gone now: sacrificial virgins to my hungry sweet tooth god.

Thanks to Lisa and Kip for the delicious treats (and the tip about the mechanic!) and to Nancy for hosting a terrific shindig.

Mayan Mystery Cookies (source)

Note: the recipe directs "tuck[ing] about 5 chocolate chips into the center of each one." Doesn't that seem like a lot of extra effort for what's otherwise a very simple recipe? (Lisa thought so, too.)

After thoroughly combining the vanilla into the dough, and just before chilling, I'd fold in about 6 oz. (half a standard bag) of semi- or bitter-sweet chocolate chips, check to see if that was enough chocolate for my preferences, and add more if need be.


¾ cup (1½ sticks) unsalted butter, softened
¾ cup sugar, plus more for rolling
1½ cups all-purpose flour
1½ teaspoons baking powder
¼ teaspoon salt
1 teaspoon cinnamon
½ teaspoon finely and freshly ground black pepper
¼ teaspoon allspice
1/8 teaspoon cayenne pepper
¾ cup unsweetened cocoa powder
1 large egg
1½ teaspoons vanilla extract
Semisweet chocolate chips (see note, above)

Line two baking sheets with parchment paper or a silicone baking mat.

Cream the butter and ¾ cup sugar in a food processor. Sift the flour, baking powder, salt, spices and cocoa in a medium bowl and add to the butter mixture. Add the egg and vanilla and process until the batter is uniform.

Refrigerate the dough for at least an hour.

Preheat oven to 350-degrees F.

Using your hands, roll the dough into balls about the width of a quarter. Tuck about 5 chocolate chips into the center of each one. Put some sugar on a flat plate and roll the balls in the sugar to cover lightly.

Place the balls on the baking sheets. Bake for 8 minutes, being careful not to overbake; the cookies should be delicate and soft in the center. Let cool on the baking sheets.

Makes about 5 dozen cookies.

Tuesday, December 11, 2007

Russian Tea Cakes


Sometimes, a cookie is so tasty that, even though you've planned to blog about it, you eat all the treats before you have a chance to take pictures.

These cookies fall into that category. (But Jerry let me borrow his photo -- Yay, Cooking By The Seat of My Pants!)


On Saturday night, we had dinner with a few of the HWS students with whom we traveled to Russia. We had a very nice time, and I especially enjoyed the Russian tea cakes Mandi brought along for dessert. They're sandy little cookies, studded with nuts and rolled in powdered sugar. They accompany a cup of hot tea very well, and are an ideal holiday cookie.


Russian Tea Cakes (source)

1 cup butter, room temperature
1/2 cups confectioners' sugar
2 1/4 cups flour, sifted
1 tsp vanilla
3/4 cup walnuts or pecans, finely chopped
confectioners' sugar for rolling

Preheat oven to 400-degrees F.

Cream the butter, adding sugar gradually until light and fluffy. Stir in flour, vanilla, and walnuts or pecans.

Roll between hands into 1-inch balls and place on an ungreased baking sheet.

Bake for 12 to 14 minutes.

Remove from oven and while still warm, roll in confectioners' sugar.

Sunday, September 16, 2007

Weekend Cookbook Challenge 20: Anisette Toast from "Entertaining With the Sopranos"


I was so, so happy to find this cookbook. One of the joys in watching The Sopranos was seeing archetypes, words, locations, and even brands that are familiar to me from growing up and living on Long Island and NY. (OK, the Sopranos live in New Jersey, but there's a lot of overlap -- trust me.) And to have a cookbook that reflects that -- too much fun.

It in, Carmella Soprano, the "author" acting as a mob-wife Martha Stewart, advises readers on how to best throw a confirmation party, host a holiday celebration, or throw a get together just for the girls.

Of course, Carmella has her own way of thinking about things. From the chapter, "Small events for Men Only":


Have you ever heard the term "metrosexual"? Me neither, until they were discussing it on The View one day [...] A metrosexual is a man, I guess, who isn't gay but likes some of the finer things in life that women tend to like, like a good facial exfoliant or a color-coordinated buffet table. Well, I'm not talking about those kind of men here.

A few of Carmela's friends and family put in their two cents as well.

Janice Soprano Baccilieri with "Tips on handling rambunctious children":
I apply a mild form of fear, as in "God will punish you if you don't behave at a confirmation party." Another technique: bribe them.


Christopher Moltisanti with "Rules on the Giving of Money":
Always give cash. No checks, IOUs, travel vouchers, gift certificates (very popular these days), or free car wash coupons. Cash. [...] Put it in a plain legal-sized white envelope. Do not put your name on it in florid script, nor include a stupid "To a Cool Grad!" greeting card.


Gabriella Dante on "When Things Go Terribly Wrong":
Worst dinner party ever? Silvio has this cute cousin from Fairfield who's really into breast feeding. Twelve people sitting around a table eating osso bucco and she pulls a breast out of her halter top and stick it in little Bobo's mouth. My dad almost choked. A friend of our daughter Heather snuck down the stairs and took a picture with his cell phone. Then Rocco, the lush, tries to place an order for low fat. Sure, it's natural, but not at my table, thank you very much.

Fortunately, I don't think we have anyone JUST like these characters in the family, but there is a lot of overlap regarding the food.

One of my favorite food memories is running around the corner from my grandmother's (Me-ma) house in Astoria to the La Guli pastry shop to buy treats for dessert. Chocolate Italian ices, seven layer cookies, sfogliatelli, those little sandy cookies sandwiched together with jam and dipped in dark chocolate and sprinkles -- mmm.

But the thing I was told to buy most often was anisette toast, or as they are known in the 21st century, biscotti. They are dry and firm -- I had to dunk them in milk so I wouldn't shred the top of my mouth when I took a bite -- but delicious. (Maybe not something with wide appeal, but they do it for me.)

So I was thrilled to find a recipe for anisette toast in the pages of the Sopranos cookbook. I had to make the recipe twice as I didn't bake the first batch long enough, resulting in a rubbery, not crisp, cookie. I noted the difference in time below.

The result is good -- the flavor is spot on with La Guli's -- but, damn you, texture! They're too crunchy and, unlike La Guli's, I suspect will chip a tooth if you don't dunk them first. (So if anyone has some biscotti tips for me, please pass them along!)

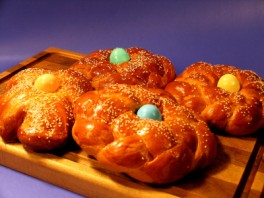
Having said that, I'm glad I got to explore "Entertaining With the Sopranos" and look forward to trying out some more recipes. (Especially the Easter Sweet Bread, which was always found at Mema's table during the holiday.)

Thanks to Sara for hosting!

Anisette Toast

3 c. all-purpose flour
1/2 c. cornstarch
1 Tbsp. baking powder
1/2 tsp. salt
6 large eggs
1 1/2 c. sugar
1 Tbsp. anise extract

Preheat the oven to 400-degrees F. Butter a 9x13 baking pan.

Sift together the flour, cornstarch, baking powder and salt; set aside.

In the bowl of a large stand mixer, beat the eggs until foamy. Add the sugar, about a tablespoon at a time, beating constantly until very light and fluffy. Beat in the anise extract. With a rubber spatula, gradually fold in the flour mixture until just blended.

Scrape the mixture into the prepared pan and spread it out evenly. Bake 20 to 22 mintues or until the top is golden an a toothpick inserted in the center comes out clean. Remove pan from oven but leave the oven on.

Let the cake cool for 5 minutes, then invert it onto a cutting board. With a serrated knife, cut the cake lengthwise in half, then cut each half crosswise into 1/2-inch thick slices.

Place slices in a single layer on two parchment lined baking sheets. Bake for 10 to 12 minutes * or until cookies are toasted and crisp. Transfer to racks to cool.

Store in an airtight container. These keep a long time.

*I baked mine for about 22 minutes total, flipping the cookies and rotating the cookie sheets about halfway through.

Wednesday, July 11, 2007

Italian Lemon Cookies


***WARNING: long, rambling blog post ahead featuring dental mishaps. Scroll down for recipe.***

I have a long history of hating dentist visits. When I was 8, I knocked out the bottom half of my top, front tooth when my bike collided with another kid's bike. A neighborhood mom sent me running for home, crying, carrying the tooth fragment in my hand.

I don't remember much about the incident other than being taken to the VA hospital where my uncle -- a dentist -- was working. Earlier in the day, an HIV-positive patient had been in and the dental station where he'd been was taped off with yellow and black "danger" tape. I was hurried past, the adults speaking in urgent, hushed tones. In my uncle's station, I lay back in the chair, frightened and struggling not to see my broken tooth reflected in my uncle's protective goggles.
Bonding was placed on the remaining shard of my front incisor, remaining there for nearly 20 years until that same uncle replaced it with a well-crafted porcelain crown. I was heavily sedated.

In my middle school years, there were a number of visits to Dr. Ianuzzi, who filled the cavities dotting my molars. Ianuzzi was tall, dark and hairy, with the gentleness and temperament of frustrated serial killer. His hygienists -- and I have found many hygienists to be this way -- were overly permed, lids heavy with blue eyeshadow, and spoke in cooing, cotton-candy toned voices, better suited for pre-school TV programming than legitimate medicine.

Two years ago, I visited yet another dentist for a check up. With barely contained glee, she pointed to my new X-rays, and asked me, "What's wrong with this picture?"
Not being a dentist, I could only guess. So she pointed again -- to the three wisdom teeth that had not "erupted," and pointed at other teeth in 45-degree angles, on a trajectory never to emerge above the gum line. The one wisdom tooth which had made it out should be extracted, too. ("Might as well!" she'd chirped .) I'd need $5,000 in dental work. The wisdom teeth -- an oral surgeon who would cut into my gums and chisel out the bloody fragments -- would cost extra.

I am finally addressing that dental work she recommended, albeit at another dentist, for a much lower price ($1,500). Today, he replaced three fillings first installed during the Ianuzzi days, and if not THE most traumatic dental experience I've had, it's certainly up there.

I suppose he's not a fan of the topical anesthetic that gives some relief to the giant needle entering a patients gums, as he injected me not once, not twice, but three times with a torture device from Orin Scrivello's office. A tear ran from the corner of my right eye, rolled down my check and landed in my hair. I was handed a tissue.

Then, metal clamps were put on my teeth, which helped hold onto the latex dental dam he then stretched across my mouth. "OK," he said. "Now we're ready." At first, I wasn't sure if he was referring to dental work or oral sex but, when I saw a loud, spinning drill head approaching my mouth, I resigned myself to the former.

The next two hours were filled with drilling, scraping, pushing, picking, and grinding. Had The Big Dig been rerouted to teeth 19, 20 & 29? Was he pushing my molar around because it had gotten fresh with him?

When he asked his assistant for a "ball burner," I'd never been so happy not to have testicles.

When it was finally done, he told me I'd be sore when the anesthetic wore off. (It did, and I am.) On his way out of the room, he told me not to eat until I'd gained feeling back, otherwise I might "bite off [my] tongue or lip and not even know it."

It was at this moment that I finally cracked, leaving his assistant to explain which teeth should be done next to me, a visibly shaken, teary-eyed patient. "Are you OK?" she asked, surprised. "Was it something we did? Said?"

I smiled as best I could with a jaw, chin, bottom lip, and tongue completely without feeling and said, "It's me. I'm just freaked out by all this. Where's the bathroom?"

I left the office 10 minutes later, $450 lighter and an appointment to go back in two weeks.

It didn't really hit me until I got home (conveniently just around the corner from the DDS) how upset I was, and how badly I needed a distraction. With that, I decided to bake up some Italian Lemon Cookies I've long been meaning to make. While the work involved did little to distract me from my numbed and swollen jaw (note: when my tongue is numb, so are my taste buds) now that both the cookies are done and I've regained most of the feeling in my mouth, they are a comfort. (Well, the one bite I had was a comfort. Now that the anesthetic has worn off, I'm sore from the injections. The fun doesn't stop.)

Back to the cookies: they're cakey, soft and a bit crumby, with a subtle lemon balanced with a gentle sweetness. Mmm-mmm. I'm looking forward to eating a whole mess of them tomorrow.


Italian Lemon Cookies (from Wegmans Menu Magazine Holiday 2004, pg. 54)

1 cup shortening (if desired, use butter in place of half or all the shortening)
1 1/4 cups granulated sugar
4 eggs
1/3 cup plus 2 Tbsp sour cream
2 1/4 tsp lemon extract
1 tsp vanilla extract
Grated zest of 1 lemon
4 1/2 cups all-purpose flour
4 1/2 tsp baking powder

Icing
1 cup confectioners' sugar
2-3 Tbsp warm milk
1/2 tsp lemon juice (optional)

Preheat oven to 350 degrees.
Beat together shortening and sugar in medium bowl until light. Add eggs, sour cream, lemon extract, vanilla extract, and lemon zest; beat until combined, scraping down sides of bowl. Combine flour and baking powder; add to mixture in bowl and beat just until moistened.

Shape dough into small balls, using about 1 level Tbsp for each. Arrange about 1 inch apart on parchment paper-lined cookie sheets. Bake 10 to 12 minutes, until lightly browned. Do not over bake. Remove from pans and cool.

Combine confectioners' sugar and milk in small bowl; whip lightly with spoon until smooth and slightly thick. Add lemon juice if desired; stir briskly until well-combined. Dip tops of cookies into icing; decorate with sprinkles if desired. Let set until icing is dry to the touch. Store in closed container.

Yield: approximately 4 dozen cookies.

Nutrition Info: Each serving (2 cookies) contains 160 calories, 22g carbohydrate (0g fiber), 2g protein, 7g fat (2g saturated fat), 25mg cholesterol and 70mg sodium.

Monday, June 11, 2007

Double Chocolate Cookies


I love these cookies. They look so happy! And why wouldn't a chewy cookie with a deep chocolate flavor and bright spots of color make people happy?

A couple of notes:
1) these cookies taste best the day they're made.
2) to get a very round final product, after dropping the cookie dough on the sheet, place a square of parchment paper on top of the dough and, using a flat bottomed drinking glass, press down on the paper and dough gently but firmly.
3) for an especially pretty cookie, press a few additional M&Ms into the flatted cookie dough before baking.

Double Chocolate Cookies (adapted)

1 cup all-purpose flour
1/2 cup unsweetened Dutch-process cocoa powder
1/2 teaspoon baking soda
1/2 teaspoon coarse salt
4 ounces coarsely chopped good-quality milk chocolate
1/2 cup (1 stick) unsalted butter
1 cup M&Ms
1 1/2 cups sugar
2 large eggs
1 teaspoon pure vanilla extract

Preheat oven to 325 degrees. Whisk together flour, cocoa powder, baking soda, and salt; set aside. Using a microwave, melt chocolate with butter in a small microwave-safe bowl (use 30-second intervals, stirring in between "zaps.")

Put chocolate mixture, sugar, eggs, and vanilla in the bowl of an electric mixer fitted with the paddle attachment. Mix on medium speed until combined. Reduce speed to low; gradually mix in flour mixture. By hand, fold in M&Ms.

Using a 1 1/2-inch ice cream scoop, drop dough onto baking sheets lined with parchment paper or nonstick baking mats, spacing 2 inches apart. Bake until cookies are flat and surfaces crack, about 15 minutes (cookies should be soft). Let cool on parchment on wire racks. Cookies can be stored between layers of parchment in airtight containers at room temperature up to 3 days.

Monday, April 30, 2007

Cardamom Chocolate Chunk Cookies


In a word: yum.

In more than one word: I can't stop eating Shuna Fish Lydon's Cardamom Chocolate Chunk cookies. I snitch them from the kitchen, brush crumbs off my shirt, dunk them in milk. Just -- yum.

To be honest, I was a tiny bit disappointed at first. The recipe calls for both ground cardamom and seeds, so I was expecting more a cardamom punch. But the ground cardamom is subtle and the seeds, which provide a flavorful burst, are few and far between. I thought about adding more seeds.

But that was on Friday, with my first batch. By today (having baked off two or three dozen more) my feelings have changed: I am fully obsessed. Sure, I might add more cardamom in the future but I've come to appreciate them just as they are: a well loved cookie with new twist.

Cardamom Chocolate Chunk Cookies (adapted)

4 c. all-purpose flour
1 1/2 tsp. baking soda
2 tsp. kosher salt
1 1/2 tsp ground cardamom
1/2 tsp cardamom seeds
2 sticks (16 Tbsp) unsalted butter, softened
1 cup sugar
1 ¼ cups packed dark brown sugar
3 large eggs, room temperature
2 Tbsp vanilla extract
8 oz. 67 to 74-percent dark chocolate, chopped into chunks
3 Tbsp cocoa nibs (optional)

Preheat oven to 375-degrees F; line baking sheets with parchment paper.

COMBINE flour, baking soda, salt, and cardamoms (seeds and ground) in small bowl; set aside. In the bowl of a stand mixer, beat butter, granulated sugar, brown sugar and vanilla. Add eggs to butter mixture one at a time, beating well after each addition. Gradually beat in flour mixture. Stir in chopped chocolate and cocoa nibs (dough will be thick).

Drop dough by rounded tablespoons onto prepared baking sheets. Bake for 9 to 11 minutes or until golden brown. Let stand for 2 minutes; remove to wire racks to cool completely.

Friday, April 06, 2007

Cookie Decorating Tips from Rachel


I've been having a nice email conversation with Rachel, a reader, and after I mentioned I was baking some cookies for Easter, she was kind enough to send me a slew of cookie decorating ideas & tips. They're great; take a look!

Idea #1: Leave the dough on the counter for 5 or ten minutes before rolling it out so it's not SO hard to roll out. I recommend rolling it out on marble or granite if you have a counter or cutting board made of it.


Idea #2


Idea #2: Take a few ramekins and put a beaten egg in each. Mix in any food coloring you'd like (for this I would use liquid, not gel food coloring). Be sure to mix well. Take a small paintbrush (I buy kids' disposable watercolor brushes because the food color is messy), "paint" your cut out cookies with it, and bake as you normally would. This gives a great "stained glass" type of effect and it's very shiny after baking. When put on a platter with cookies done with royal icing, it's a great contrast of cookies/effects.

Idea #3: When mixing any icing or egg yolks with food coloring, use lollipop sticks from a baking supply store. They are great for adding more gel food coloring, too, to whatever you're coloring. The colors get messy, and also require constant mixing of different batches. This cuts down on mess by a lot! (And the small size is great, too)

Idea #4: When mixing royal icing in the Kitchen-aid, cover the bowl with a damp towel while mixing small batches of colors so it doesn't dry out.

Idea #5: Put fresh batches of colored royal icing directly into the piping bag. Then, take a tall drinking glass, and put a "wad" of wet paper towel in the bottom of the glass. Put each colored piping bag in its own glass like that. This way, they are standing up straight, they don't get dried out at the tip, and you can see what you're working with.

Idea #6: When you want to cover an entire cookie in royal icing, pipe icing around the border first, and let harden for a few minutes. Then go in and "flood" the cookie within the border with the remaining royal icing (you could make a thinner batch of icing for this--just add more water). Nothing slides off the sides and you get a nice glossy, even coat of icing on the cookie. Much more so than using an offset spatula.

Three ideas from me, the first two to be used after you've flooded a cookie:

Ideas #6 and A (and a chocolate cookie decorating with royal icing)

A) Pipe thin stripes colored royal icing over the area that's been flooded. Then drag a toothpick across the royal icing and through the flooded icing. The result is a cookie that looks like the top of a Napoleon. (Here's Martha demonstrating the technique on her show.)

Ideas #6 and B


B) Allow the flooded icing to dry completely (I suggest overnight). Then, place drops of liquid food coloring onto a plastic plate, blending colors as you like. Using a paintbrush, dip the brush into the food coloring and paint images onto the surface of the cookie. The effect is similar to watercolor painting.


Idea C (Plus a butterfly cookie iced with white and robin's egg blue frosting and sprinkled with sanding sugar)


C) Instead of icing a cookie, drop dots of food coloring on the surface of a baked cookie. Then, using a straw, blow the food coloring across the top of the cookie. You'll be a culinary Jackson Pollock.